Tomato ‘Golden Mama’

March 20, 2009

A Favorite Tomato Cultivar

Ok, the yummy orange paste tomato I tested last year for Organic Gardening magazine is one of my current favorites. This is a tasty paste tomato, similar to a Roma, but with lemon yellow flesh and a light sweet flavor. It's heat tolerant, compact with good fruiting. Can't wait to make some golden spaghetti sauce this year...

.jpg


Pretty as a peach…

March 15, 2009

The three ornamental peaches I planted last year are all popping. They are each a double flowering variety called 'Peppermint'. Blooms appear in shades of hot pink and white/pink stripes. They are the fascination of my 1 1/2 year old neighbor, Madeline. And the other neighbor, Lonnie...who is not so much 1 1/2 but who nonetheless gets all giggly like a little girl when new things are blooming in my garden. Delights for kids and not so much kids alike! Purrrty.

.jpg"Peach_peppermint2"
.jpg"Peach_peppermint09"


Grow Fabulous Mustard Greens

March 12, 2009

Mustard Green 'Southern Giant Curled'

I grew a wonderful mustard green in the garden this past fall through winter and it's still going strong. It's called 'Southern Giant Curled' and you can procure the seed from Botanical Interest. I'd direct seeded it out into the garden and it's been as happy as could be all winter long. But I sort of forgot about harvesting much of it. I mixed some of it into a fresh salad the other day and was reminded about how tasty it is! Sweet tasting leaves followed by just the right amount of spicy mustard flavor. This variety is very slow to bolt and the plants in my garden haven't even thought about blooming yet. It's a pretty plant to boot...

.jpg


It’s good to be a gardener…

January 30, 2009

Even on chilly winter days when your toes feel like ice cubes...well, my toes always feel like ice cubes. After a bit of an ice-storm here, the sunshine is back but it's still too cold for me to venture outside. Maybe in a couple of hours. I'm on vacation right now so I'm taking advantage of my free morning to relax, have some coffee, start some seeds and record things in my garden journal. Which I'm TERRIBLE about doing by the way.That's what happens when you're a professional horticulturist...you do all the things you tell your students/clients NOT to do! lol. Actually, it's one of the reasons I started this garden blog. Not because I wanted to showcase any brilliant garden writing, have a million people view my garden, or any such pursuit. I started it so my friend Carolyn and I could keep up with each others gardens and so I could keep better track of what I did and when.

.jpg"StartingSeedsnew"

So right now I'm starting more seeds of the varieties I test for Organic Gardening Magazine, I can't divulge the variety names for the test plants (names have been blotted out for your own protection!), but there is an assortment of tomatoes, spinach, celery, squash and more. The test spinach has already gone out into the garden, along with the cutting celery and lettuce. In addition to the test plants, I'm also getting some seeds going for some of my other standard favorites. Tomatillos purple and green, Tomato 'Aunt Ruby's German Green', 'Green Zebra', 'Marvel Striped' and a few others.

I keep all my seeds in plastic buckets with lids so I can tote them around. Seeds packets are sitting in piles around me at the moment...oops, just dumped a bunch of okra seeds all over the floor...those will go directly into the garden in April. Still trying to decide what else I'll start indoors right now...


“Winter” Veggie Garden update…

January 19, 2009

I say "Winter" in quotations because I know that what we experience as winter here in Dallas is not really winter when you talk to someone from Minnesota...but hey...it's what we've got!

Just a few photo updates from the veggie garden this weekend. I direct seeded some spinach and peas into the garden, which you can get away with doing this time of year here. I've you've never grown peas or beans in your garden before, you might want to use a garden inoculent first time around. Then make sure not to overfertilize with too much Nitrogen. Legumes will fix most of their own from the soil, so too much supplemental Nitrogen can result in lots of growth, but not a lot of fruit.

.jpg"Peas_planting"
.jpg"Fava_bean"

I seeded some fava beans, a bit to late, last fall but I've been amazed how well they've made it through the winter. We have had a pretty good run of hard freezes lately, with 23 F a few nights ago. I've not covered the plants but they've toughed it out just fine. Even started blooming again a couple of days after flopping over completely in the hard freeze. I'm so proud of them...

.jpg"Broccoli_baby"
Brussels_sprouts

Baby broccoli, Brussels sprouts, cabbage and cauliflower are coming along. Actually, we harvest broccoli most of the way through winter, but the rest take a bit longer to mature. Can't wait for the Brussels sprouts. I'll be setting out another round of Cole crop transplants in a week or two. Oh, and I'm terrible about pulling radishes when they're ready...I always seem to leave them too long in the garden. Resulting in giant overgrown monsters! They are still quite edible, but will develop scabbing on top of the root where they're exposed to light. I have some of the biggest radishes I've ever seen...

.jpg"Cauliflower_baby"
.jpg"Radishes_winter"

Tasty Recipes for Fresh Turnips

January 14, 2009

No Idea What to do With Your Homegrown Turnips?

So if you veggie garden on schedule here in Texas, you should be harvesting turnips right about now. I'd say most people my age would ask the question: "What the .... do yo do with TURNIPS?" Well, they're actually quite tasty, and super easy to grow here. Just sprinkle the seeds directly into the garden in fall and late winter (now), then the seedlings and then just leave them alone until they mature. Don't let the turnips get too big before you harvest them, the flavor is better when they are medium sized.

My favorite white turnips

My favorite white turnips
PC: Leslie F. Halleck

You can make a "mash", as the British would say"...I like to combine potatoes and turnips together to make a mash. Boil your potatoes and turnips (separately) to a mash appropriate softness. Drain and mash or blend with some butter, fresh parsley, salt and pepper, a bit of cream and some horseradish. MMMM. yes horseradish, that you also grew in your garden and processed...and is sitting in it's jar in you fridge.

OR, you can make these yummy Potato and Turnip cake's from her majesty Martha Stewart:

Serves 4

  • 1 pound russet potatoes (about 2 medium)
  • 1/2 pound white turnips (about 1 large)
  • 1/4 cup olive oil
  • 1 teaspoon coarse salt
  • 1/4 teaspoon ground pepper

Directions

  1. Coarsely grate (with a box grater or a food processor fitted with the grater attachment) potatoes and turnips, all scrubbed and trimmed. Squeeze to remove as much moisture as possible; transfer vegetables to a medium bowl. Toss with coarse salt and ground pepper.
  2. Heat olive oil in a large skillet over medium heat. Form potato mixture into four tightly packed patties; place in skillet, flattening gently with a spatula to a 3/4-inch thickness. Cook patties, turning once, until browned and cooked through, about 10 minutes per side (reduce heat if patties start to brown too quickly, and add more oil to skillet if necessary). Transfer to paper towels; sprinkle with salt.

OR, how about this Turnip Puff from Cooking for 2's website:

  • 3 cups cubed peeled turnips
  • 1 tablespoon butter
  • 1 egg
  • 4-1/2 teaspoons all-purpose flour
  • 1-1/2 teaspoons baking powder
  • 1-1/2 teaspoons brown sugar
  • 1/4 teaspoon salt
  • Dash pepper
  • Dash ground nutmeg
  • TOPPING:
  • 2 tablespoons dry breadcrumbs

2 teaspoons butter, melted


Place turnips in a large saucepan and cover with water. Bring to a boil. Reduce heat; cover and cook for 10-15 minutes or until tender. Drain; mash with butter. Cool slightly.

Beat in egg. Combine the flour, baking powder, brown sugar, salt, pepper and nutmeg stir into turnip mixture.

Spoon into a 3-cup baking dish coated with cooking spray. Toss bread crumbs and butter; sprinkle over casserole. Bake, uncovered, at 375° for 30-35 minutes or until heated through and a thermometer reads 160°. Yield: 3 servings

OR you can roast or broil them with some olive oil and salt. Super yummy. They are also good mixed into soups or stews like you'd use potatoes. The greens can be braised or steamed with a bit of garlic, butter and lemon juice.

I know, I know...turnips can be an acquired taste. I think it's time we acquire it.


I know it’s January…but your garden needs you!

January 13, 2009

Lots to do in the Winter Garden

Yes, it's January...the time of year in Texas when people like to pretend there's nothing they could possibly do in the garden. Not so my friend, not so!

After catching every virus known to man this past fall (jump from 2009 to 2024 and I apparently still catch every known virus from fall through winter!), I'm finally feeling my spry self again and managed to get a bunch of gardening done this past weekend. I cleaned up the mess that was my front display beds and planted all my spring-flowering bulbs, which always include a few hundred tulips, Dutch Iris, daffodils, grape hyacinth and so on and so forth. My bulb collection is getting out of hand.

Each year as I go to plant new bulbs, I inevitably dig up some already inhabiting that spot. Then I feel so guilty and have to apologize to the poor little bulbs I just disturbed from their winter slumber. Also managed to get some composted cow manure worked into the veggie beds along with a bit of clean up.

Winter Vegetable Garden

Again, January is a great time for the cool-season veggie garden in southern climates. Right now I've got tons masses of lettuce greens going gangbusters, radishes the size of my fist (that's what happens when you leave them in the garden too long!), turnips, tons of broccoli to harvest, collard greens, baby cabbages on the way along with baby Brussels sprouts. Which btw, if you've never grown and tasted your own Brussels sprouts you DO NOT know what you're missing. They are super easy to grow here and you'll never taste anything like them from the grocery store.

Carrots are coming along, but not quite ready to harvest. I have the prettiest stand of Fava beans you ever did see...obviously they are not producing right now, but if I can get them through the last round of freezes I'll hopefully have an 09 harvest from them. Let's see, what else, oh, Pak Choi and spinach and the cutest baby cauliflower heads. I promise I'll get photos posted soon.

Next week I'll be starting my seeds of tomatoes and a few other warm season crops along with a second round of Cole crops (broccoli, cabbage, etc.). Spinach seeds can go outside now along with onion sets and slips. Next month I'll start direct seeding more salad greens, carrots, herbs, plant seed potatoes, rhubarb and more. I might even start an asparagus patch this year. There is just so much to do!

If you live in Texas, January is a great time to prep your beds, harvest cool season veggies if you got 'em, plant your bulbs if you didn't when you were supposed to (December), plant dormant fruit trees and any container grown hardy trees and shrubs. Pansies, violas, Iceland poppies and the like can also be planted here right now. And start your spring veggies!


Building a New Flagstone Patio

November 9, 2008

Finally, after a long wait, I'm getting my flagstone pathways in the front and side of house, as well as a patio in the back, installed this weekend. I'm so excited I can barely stand it. I'm one of those folks that will stash and save until I can afford to pay cash for what I want, so I've been waiting patiently for about 4.5 years to have all this house work done. It's amazing the difference it makes having proper pathways.

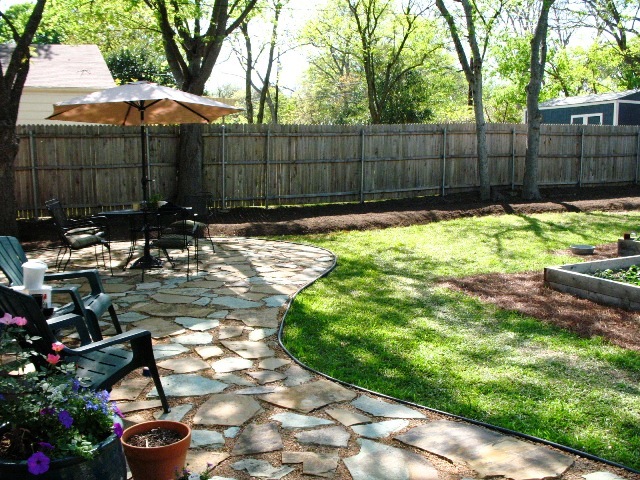
I went stone shopping last weekend at a local stone distributor and of course i happened to find two lonely half pallets of the coolest green flagstone tucked away on the property. When I asked the sales person if they had more, she told me they'd had that stone for a while and would not be getting any more. Of course, I always have to like the stuff no one can actually get their hands on. So after circling the stone yard for about 30 more minutes, talking to myself, running calculations on my cell phone calculator, I decided to gamble and go for a mix. Because I had to have that green stone. I have a thing about greens. The entire inside of my house is painted varying shades of greens, teals, etc. So I snagged the two pallets of green stone and filled out the order with three more pallets of terracotta colored Oklahoma flagstone. And crossed my fingers it would look good together.

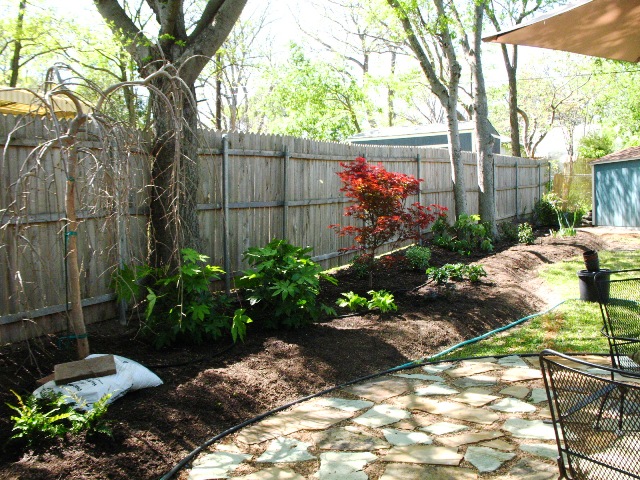
So far so good...here is how it's looking so far. The areas are dug out about 2.5 inches, lined with weed-block fabric, bedded with decomposed granite, then the stone is laid and packed in with more decomposed granite. For those of you wondering about materials, I had about 490 sq. ft. to cover. The flagstone will cover about 80-90 sq.ft. per ton (depending on the type/size of stone - the smaller the stone, the less the coverage). So that was 6 tons of stone (about 5 pallets) and about 6 tons of decomposed granite. groovy. I'll post more photos upon completion. whoohoo!


.jpg

.jpg


.jpg
.jpg
.jpg


Back to top

Tips in your inbox

E-Newsletter

Sign up for my monthly E-Newsletter for botanical business news, horticulture courses, and tidbits for plant and gardening lovers!