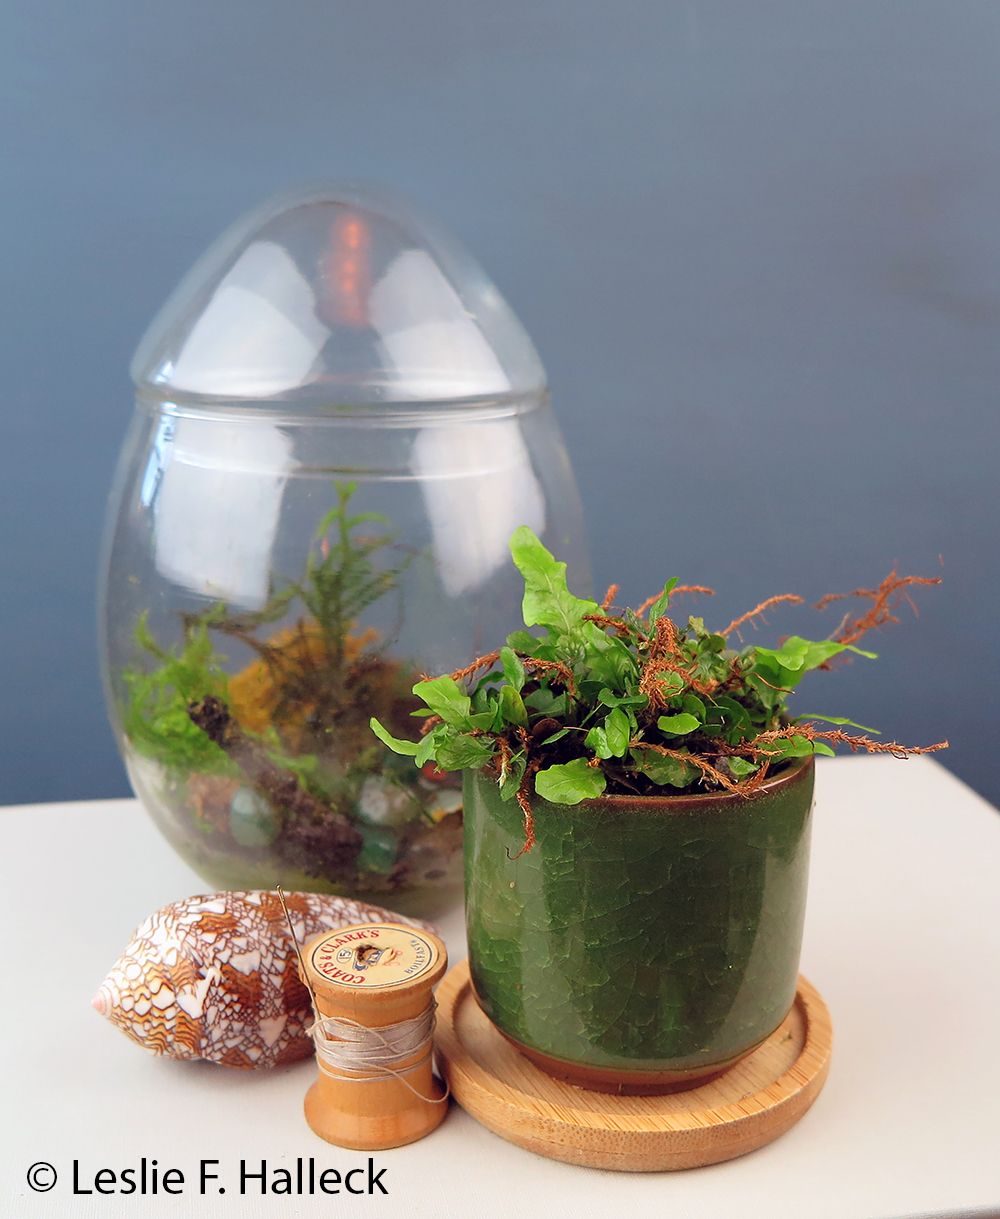
Why are you FLF’ing yourselves? Fiddle Leaf Figs and WHY They Look So Sad

January 24, 2024

Struggling With Your Fiddle Leaf Fig? Here's Why

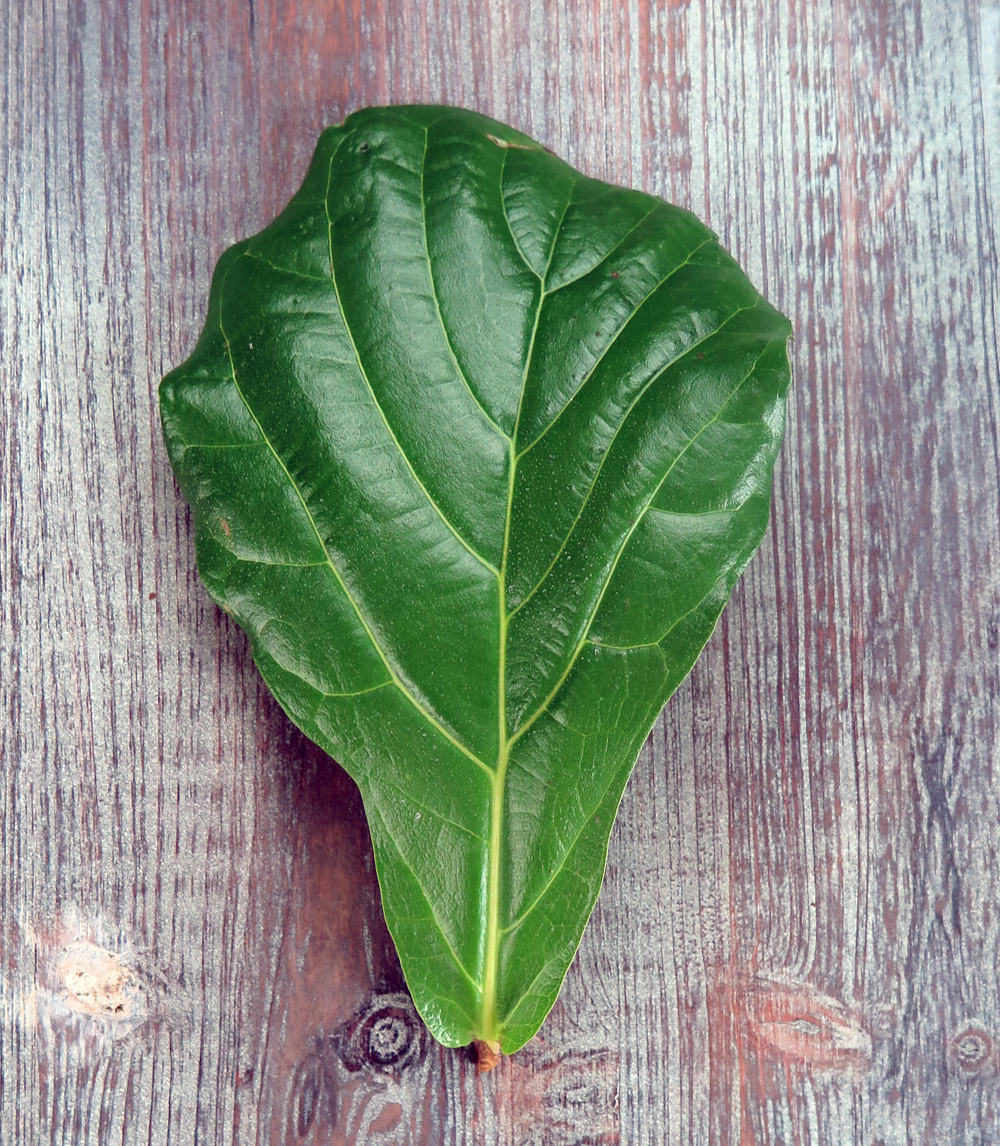
Why are you FLF’ing yourself?

I hereby absolve you of any responsibility for growing a beautiful fiddle leaf fig (Ficus lyrata) indoors, and any green guilt you may be carrying around because you keep killing them (or they constantly look so sad in your house that you feel like a bad plant parent).

See, here’s where knowing a little botany and understanding some light science comes in handy. Folks, FLFs are BIG ASS trees, and not only that they are what we consider fruit bearing trees (you know, figs?). They are in the FIG and MULBERRY family, which should tell you something about the kind of light (ENERGY) these beasts really need.

Not only are these trees getting exponentially more light outdoors (even in a dense rainforest type situation, and many FLFs will grow quite happily out in full sun) but they are also semi(hemi)epiphytic (which is why the root zone needs some drying between waterings ) and like warm humid environments to sustain that form of growth.

We stick them in our dark, cold, dry homes and then wonder why they always look so sickly.


NEWSFLASH: you don’t have what an FLF needs in your house.


I guarantee you, 99% of you that have a happy FLF have an FLF that lives OUTSIDE on your patio, at least for a good part of the year! OR you have several grow lights, or one more powerful grow light, that is keeping your FLF from the edge of death.

While FLFs might not like super hot direct sun coming through a window and hitting it’s leaves (very high PPFD), that doesn’t mean it doesn’t need a substantial DLI (daily light integral) - meaning the overall quantity of light it receives through the day - to thrive, rather than just barely survive.

1. You never have as much light in your house as you think you do.

2. It’s ok to get rid of plants that constantly frustrate you.

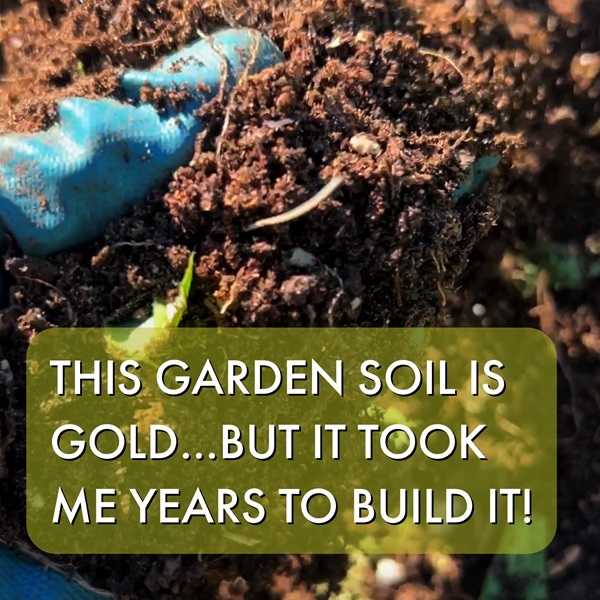
3. Your compost pile is your friend.


TOTIPOTENCY! Begonia Petiole Leaf Cutting

January 18, 2024

What is Totipotency?

TOTIPOTENCY! Do you know what it is? 🌱

If you’ve taken any of my classes, or listened to me on podcasts, then you might know one of my favorite botanical vocabulary words is “totipotency”. This word refers to the potential of a cell (which may be limited or unlimited) to differentiate into tissues OTHER than what it is initially genetically programmed to do.

PC: Leslie F. Halleck

For example, the morphological form of a petiole cell, is, well, to grow a petiole! BUT in some species of plants (not all) petiole cells can have the genetic potential to differentiate into OTHER types of plant tissues (when wounded), such as new root shoots, bud shoots, and ultimately stems, leaves, flowers, fruits and seeds!

Seeds are totipotent…meaning they contain all the genetic information to differentiate into ALL the plant tissues. Some cells are multipotent or pluripotent, meaning they can differentiate into a few or many different (but maybe not all) types of tissue in that species.

PC: Leslie F. Halleck

Begonias are Masters of Vegetative Cloning

...and you’ll find that the cells in the stems, petioles, AND leaves can all differentiate into all the types of tissues the plant needs to grow an entirely new clone specimen…from roots to seeds. But you can’t do this with every plant!

Learning Resources

You can learn all the how-tos of plant propagation (seeds to vegetative propagation) in my book “Plant Parenting”. And if you want to dig into this topic further, you can join my “Botany for Gardeners” course through UCLA Extension (its open registration, online, and registration opens February 5th 2024, class starts April 1! Same for my Indoor Plants Care and Maintenance course, which I’m teaching again in spring 2024.


2024 Gardening, Landscape, & Houseplant Trends from a Horticulture Expert

January 12, 2024

What plants, gardening, and landscaping ideas are on trend?

Can Anyone Really Predict Garden & Plant Trends?

Before we dig into plant and gardening related ideas I think are growing in 2024, let me make a general statement about predicting trends. Anyone who tells you they can accurately predict trends is probably just blowing a bunch of hot air up your plantaloons. So, always take trend reports with a grain of salt and a splash of skepticism. Use them as a tool to evaluate what may, or may not, be relevant to you and your business or personal needs. That said, if you've ever before heard me give a talk about green industry trends at a conference, you'll know I do believe that you can:

a. create trends
b. control conversations around trends, and
c. follow the breadcrumbs left for you all over different forms of media, popular culture, and the market to get a good sense of what consumers - in this case gardeners, plant parents, homeowners and the like - are paying attention to. The things that look like they are becoming, or could be, current and future trends.

If you pay attention, you can either create your own trends, more quickly discover topics your target customer is paying attention to so you don't end up reacting to their wants and needs after it's too late, and a trend has already disappeared.


"The theme I'm giving 2024 in regards to gardening and houseplants is Go Natural, which really just translates to Make it Easier for Me..."


Here are my top picks for growing houseplant and gardening trends

So, what have I noticed going on in the marketplace - be it from monitoring major and minor media, social media, industry business, and my own students - and what what trends seeds have I personally planted in the last few years? Well, when it comes to the landscape I'm not seeing a lot of new trends, but rather a lot of rebranding of established trends. When it comes to indoor gardening and houseplants, I do see some more identifiable changes going on.

GARDENING & LANDSCAPING TRENDS

Maximalist Immersive Ornamedible Gardens

Ok, I made up "ornamedible" but I think you get my point! Again, edible landscaping is nothing new. People have essentially been doing this as long as agriculture and gardening have existed. And I was teaching edible landscaping classes twenty years ago. The key word here I think is immersive. Essentially, I'm seeing a desire to blend all disciplines of ornamental gardening, with the kitchen garden, with all the outdoor living amenities and features (such as seating, kitchens, water features, etc.). You know, an all inclusive space where you can sink yourself into your surroundings outdoors, which happen to include a bit of everything from flowers, to fragrance, to your kitchen garden, to you fruit trees, to container gardens, to where you relax outdoors. Rather, I suppose, than segregated outdoor spaces, we're just going to surround ourselves with everything, all at once. I think I'll call this "garden bathing"!

Funny enough, I kind of see the opposite thing going on in the houseplant world right now, which I'll address here in a minute.


"Less formal, more colorful and inclusive outdoor environments"


PC: Leslie F. Halleck

Eco-Lawns or No-Mow Lawns

Eco lawns, or eco-friendly lawns, which may also be referred to as no-mow lawns aren't anything new. So I don't really consider them a new trend for 2024, rather simply a rebranding of many forms of xeriscaping, or low-input low-maintenance landscaping. Now, this is not the same as prairie gardening or meadow gardens, which I'll talk about next (however you may see the terms used interchangeably), but rather replacing standard lawn grasses, or turfgrass as many of us in the horticulture industry refer to them, with really any type of garden plant, be it perennials, native plants, bulbs, succulents....whatever you think is pretty, or sustainable, or suits your maintenance needs. The goal being a prettier but more natural, less-manicured space, without the need for weekly mowing. We used to think of no-mow lawns more strictly in terms of replacing turfgrass with other very low growing "steppable" plants, such as creeping thyme, or other low-growing groundcovers that could handle foot traffic. Currently what I'm seeing is a more generalized shift into what I'd consider a traditional perennial border, or pollinator garden, and the like, being installed in a less formal style, in place of a conventional front yard lawn. Now, what plants you choose for an Eco-lawn should be well-adapted or native to your local area, and ideally be a more sustainable choice when it comes to resources and wildlife support. BUT, I'm also seeing plants being chosen simply for aesthetics again. So it's kind of a free-for-all when it comes to plants you replace your grass with. YOU DO YOU!

Now, unless you have a very sunny location, a lot of the eco-lawn or no-mow plant options promoted may not work for you. A spot that's too shady to successfully grow turfgrass isn't going to support sun-loving succulents or perennials. Soil drainage, rainfall, temperature, sunlight will all play a role in what plants you can, or can't, grow as a lawn alternative.

Meadow Gardens

Again, meadow gardens, or prairie gardens, aren't a new concept. They've come and go in some form many times over. I remember giving a talk oh, 10 or so years ago, at a Perennial Plant Symposium conference on "Restoring the Prairie, One Backyard at a Time" (article I wrote for Greenhouse Management Mag.) The prairie look and plant matrix approach first (this last time) took hold in the landscape design and architecture realm, and has spilled over in to home gardens and DIY landscaping. Over the last decade there's been increasing interest in prairie and meadow gardening in suburban yards, and a few different evangelists that now lead the prairie gardening charge. So meadow gardens can also be a form of Eco-lawn, or they may replace other more formal landscape design styles in existing landscape beds. Obviously, meadow gardens are very much focused on creating a natural look without all the traditional gardening maintenance that goes along with more traditional perennial and annual plantings. That's not to say you won't have some maintenance to do in a meadow garden from time to time, can take some time to get established, and will change and evolve over time, meaning some plants you didn't expect to take over may do so, and others may simply die out. So a meadow garden is by no means a set it and forget it approach to gardening, it's just different.

Now, realize that as much as prairie gardening enthusiasts want to insist this is the way you need to go in your home landscape, with only "native" plants, their way, or plants, may not work for you, given your climate, weather, soil, etc. As I always say, gardening is local...really it's ZIP CODE local. So if your region's natural environment is NOT naturally a prairie ecosystem, you may struggle to follow the advice or prairie planting lists provided in popular media. It's all about knowing your environment and the plants that will or won't work under your growing conditions, and finding appropriate alternatives. For example, if you have a very shady landscape, with a few large shade trees, don't expect to grow a field of blooming wildflowers or be able to create a traditional prairie look. It's not going to happen. You'll need to choose plants and groundcovers that can thrive in shady conditions.

Make it Easy for Me Landscapes: Grow Fluffy

Not much to say on this "trend" other than reducing labor and maintenance in the landscape is also nothing new and is still the top of most homeowner lists (with the exception of those who consider themselves gardeners). LOW WATER use plants that require LITTLE TO NO PRUNING. Pretty simple.

For any of you who want these landscape features, you need to go ahead and embrace my gardening style, which I call "fluffy gardening". Ditch the square holly and boxwood hedges, and let all your plants grow to their natural form and size (which means you have to plan from the beginning). Once you stop pruning them all the time, you'll end up with plants that actually flower and fruit, which will certainly make the birds and the bees happier.

HOUSEPLANT TRENDS

Edited Houseplant Collections

Ok, pandemic parents got a little overwhelmed with their huge plant collections, amassed over a relatively short period of time. Many were surprised at the amount of time, and mess, a big collection of big indoor houseplants needs and generates. So I'm seeing a lot of houseplant enthusiasts editing down their collections, or seeking out specific species that may be better suited to their needs. Especially as many of them have become much more educated on the subject. While trends might be moving into a more maximalist and colorful mix in the outdoor garden, I'm seeing more neutral interiors with a fewer, but more thoughtful, plant selections represented indoors. Interesting forms and shapes.

Now, let me be clear...most of them aren't giving up on houseplants. There's still a huge interested and pandemic collectors are still buying new plants. But I do see them becoming more analytical and purposeful about which plants they buy. So, not necessarily no houseplants, but rather more curated collections that are better suited to personal style and schedule.


"Ultimately, most of us are looking for how to make houseplants easier for us, while still maintaining our passion for plants and collecting."


Tiny Houseplants

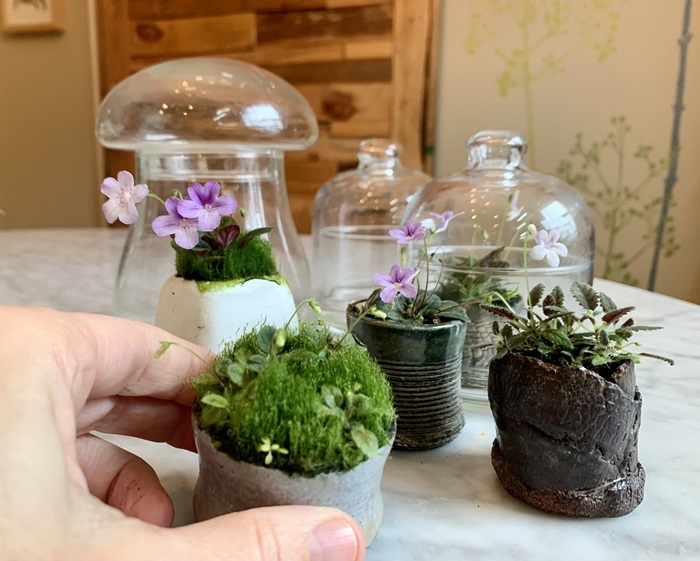
Yeah, I'll just admit I've been forcing this trend on everyone since I put out my "Tiny Plants" book! But interestingly enough, I have felt a vibe lately, and I'm starting to get more new articles popping up about tiny plant trends. Again, an interest in tiny plants isn't totally new, anyone who has planted terrariums, vivariums, aquariums, or ripariums, is obviously dabbling in the world of tiny plants. BUT, I think smaller and miniature houseplants are starting to appeal to more houseplant enthusiasts as a direct reaction to downsizing some of their larger plant collections. Tiny plants allow you to keep collecting, but without filling up - or over filling - your space! If you only have a small space indoors with which to keep plants, or struggle with low humidity indoors, then growing tiny solves all sorts of problems and creates all sorts of opportunities. Again it makes collecting plants easier. I teach you ALL about it in my book.

But beware, a lot of the blog posts I see popping up lately about tiny plants, often don't actually include any tiny plants! Sorry, but a rubber tree, or an asparagus fern, or a Swiss cheese plant are NOT tiny plants, lol. So dig a little deeper if you're actually looking to grow tiny.

A collection of some tiny blooming Sinningia plants.

A collection of some tiny blooming Sinningia plants.
PC: Leslie F. Halleck

Aroids are SO Yesterday...Let's Bloom!

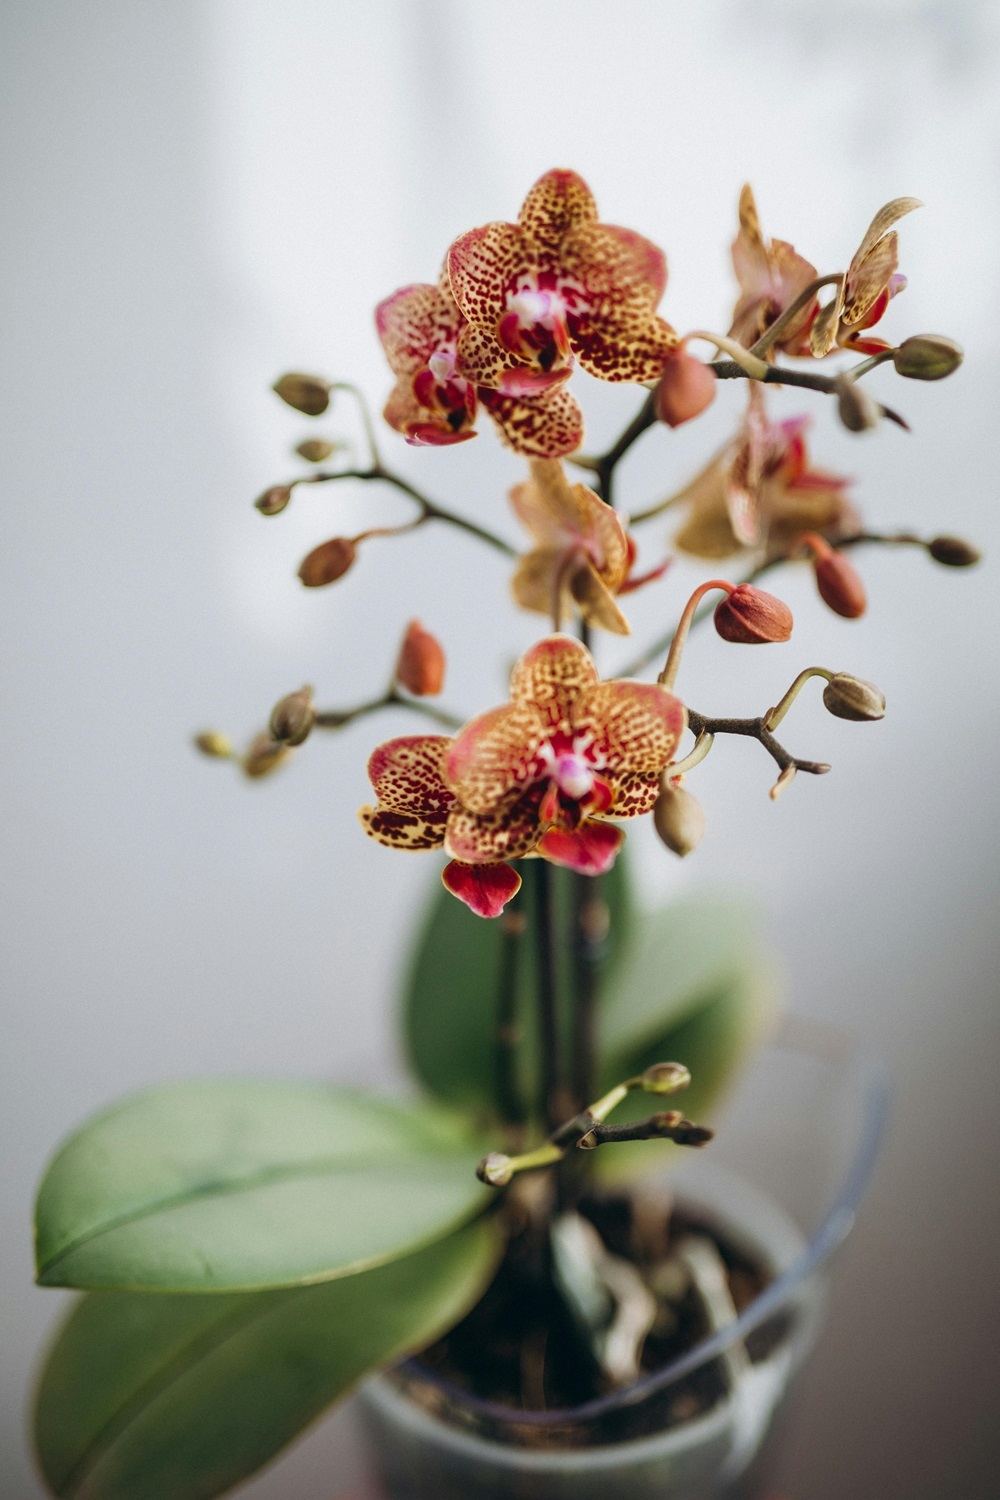
Ok, I don't think anyone is giving up on their Monstera or Philodendron anytime soon, nor should they. But I know there is a lot of fatigue from dealing with both very expensive and very high-humidity diva aroids (such as Anthurium). And I see a shift in preference to more color and to flowers. Obviously growing flowering plants usually requires grow-lighting, but after the last few years of home gardeners investing in more grow lighting, and the ease of use, availability, and quality of LED grow lighting available, growing indoor bloomers such as orchids and Gesneriads is making a comeback. You can learn more about setting up grow lights in my book "Gardening Under Lights".

Think miniature orchids, African violets, Streptocarpus, gloxinia, and the like...These small blooming plants can bring a lot of cheer indoors without a lot of work.

Indoor Trees & Olives: The new Fiddle Leaf Fig

Indoor trees are a thing again. Oh boy. Ok, let me just tell you right now that keeping olive trees indoors is not easy, just as keeping a fiddle leaf fig happy indoors in most home environments isn't easy either! That's because they are TREES that need a lot of light. But oh yeah, if you look at any of the popular furniture sites, magazine covers , etc, right now...there's the olive tree. So get ready for more requests.

Trees indoors in general is a decorating trend gaining popularity right now - again, because of how people see them styled in photo shoots - just like the infamous FLF - so get ready to modify your long-term expectations about indoor survival of such trees, be prepared to buy some grow lighting, and to potentially move such trees indoors only temporarily...then move them back outside. Or, you can just pick up one of the many FAKE olive trees you can find for sale right now! That's a thing right now too! Not really what I'd call going natural but it's definitely going easier.

Indoor & Outdoor Gardens: Give me ALL THE PEACH FUZZ!

Rose 'Crown Princess Margareta'

Rose 'Crown Princess Margareta'
PC: Leslie F. Halleck

Ok if you want to get in on some color trends and play along with Pantone's annual "trend" creation, then peach fuzz it is! Now, I'm including this because I happen to have a particular penchant for peach plants...along with an affinity for alliteration. (I'm sorry, I had to do it!). So I'm getting on board with peach fuzz and if you are too here is a list of some of my favorite peach flowering or foliage houseplants/tropicals:

  • Philodendron 'McColley Finale', 'Prince of Orange'
  • Anthurium 'Joli Peach'
  • There are a BUNCH of succulents that have foliage color ranging into peach - Echiveria 'Peach Garden', 'Peach Curls', Pachyphytum 'Peach Beauty', Graptosedum 'California Sunset'...I mean there are a bunch.
  • As well as many succulents with peach colored flowers
  • Lewisia longipetala 'Little Peach'
  • Kalanchoe blossfeldiana 'Orange;'
  • Hibiscus rosa-sinensis 'Peach' but there are a bunch of hibiscus cultivars in the peach range
  • Plumeria 'Penang Peach'
  • There are several peach flowering Abutilon cultivars - 'Thompson's Variegated Peach', 'Blushing Moonlight', Victor Reiter’
  • Ixora 'Peach Delight' but there are several other cultivars in the peach/orange range.
  • Copper plant could get in the mix - Acalypha wilkesianaTillandsia capitata ‘Peach’ - the silver leaves turn a nice peach color (AND They are already fuzzy!)
  • Philodendron 'McColley Finale', 'Prince of Orange'

There are other "vibes" I could talk about in terms of gardening and houseplant trends right now, but I think this is enough to digest for now! What trends are you seeing, or what trends would you like to start?


Happy National Houseplant Appreciation Day! Bad Internet Plant ID

January 10, 2024

Can you trust the internet to ID your plants?

Plant ID online is like…

Bad lip reading for plants! 🌿🪴🌱🫦

To celebrate National Houseplant Appreciation Day (no for real, it’s a thing because we say it is), and the start of my UCLA Indoor Plants course this week, where we’re learning the basics of plant nomenclature, I’m gifting you a bit of clarity on some very common, very bad misidentification of some of your favorite chartreuse philodendron. Tread carefully with all those plant apps and websites (bring a machete)…cuz it’s a jungle out there


That heartleaf philodendron isn’t really ‘Lemon Lime’ OR ‘Neon’ it’s Philodendron hederaceum var. oxycardium ‘Aureum’. The cultivar name ‘Lemon Lime’ belongs to a cultivar of Philodendron domesticum. An official cultivar name may only be associated with ONE species of the same genus. You don’t get to just pick the one you like!

‘Neon’ is a cultivar name used with a Pothos, Epripremnum aureum ‘Neon’. Now, you can have one selection of Epipremnum with the cultivar name ‘Neon” and ONE selection of Philodendron with the same name ‘Neon’…but not in the same genus. That said, folks still get it wrong with ‘Neon’ when using it with Philodendron. Any web search will server you up with any number of incorrect identifications and incorrect cultivar names.

💚💛💚

Cheers to your botanical factoid of the day!


Botany 101: Why are There Seedlings Sprouting From my Tomato?!

January 4, 2024

What in the TOMATO??

Have you ever had a tomato that’s sitting out on the counter (where they should always be, never in the refrigerator!), and it looked like little aliens were sprouting inside the fruit?

For your botanical factoid of the day, this is called vivipary! Vivipary in fruits happen when the germination inhibiting hormone in the seeds breaks down, and exposed to the moisture in the warm cozy fruit the mature seeds inside the fruit start germinating and growing. Eventually they will burst through the skin of the tomato (“An organism. Open the hatch!).

PC: Leslie F. Halleck

Tiny seedlings have enough resources stored up in the seed to allow them to grow this way…but eventually they’ll need more light, water, and nutrients to keep growing. Now, you don’t want to eat these tomato seedlings - they are in the nightshade family and contain toxins. BUT you can try planting them, know that if they come from a hybrid tomato, your seedlings will have more randomized genetics and who knows what you’ll get!

To learn how to grow one or a few micro tomato plants indoors read 10 Steps to Grow Tiny Tomatoes Indoors from Seed to Harvest

To learn a bit more on how to stagger and stage grow lighting for your tomato plant indoors read Grow Lighting: Tiny Tomatoes Indoors

Vivipary in a tomato fruit

Vivipary in a tomato fruit
PC: Leslie F. Halleck

Plant dormancy is a complicated and nuanced biological function. While the word gets thrown around a lot to describe many plants or stages of plant development, you might be surprised that tiny many cases there is no true dormancy, but rather quiescence, or a resting period where growth can still occur much more slowly. I get into this in my Indoor Plants and Botany courses (and I have a whole class on plant dormancy that I may put online if you’re interested).


10 Steps to Grow Tiny Tomatoes Indoors from Seed to Harvest

January 3, 2024

Grow Tiny Tomatoes Indoors Step by Step

If you wish you could grow tomatoes indoors, then I suggest starting small! Micro tomatoes, also called microdwarfs, such as 'Micro Tom', are really the easiest types of tomatoes to grow indoors, and a great place for beginners to start. Larger and slicing tomatoes require a lot of light...a DLI (daily light integral) of about 25-30 Mol/m2/day. That's tough to achieve indoors unless you're using higher powered HID (high intensity discharge) lighting. Usually large LED panels or LEC grow lights. I grow mine using HID lighting in grow tents. But most of us don't have space for that kind of setup, nor want to invest in it. But if you have a little space to dedicate to one to three miniature tomato plants, you can harvest some tasty cherry tomatoes using lower output grow lights.

Micro Tomato Plants

Step 1: CHOOSE YOUR SEED

Luckily there are many more types of dwarf tomatoes on the market these days for you to choose from. Make sure to read the cultivar descriptions so you can pick the ones you're most interested in, depending on size, form, flavor, and color. Some will fit your space better than others. Some are true micros, while others are miniature or dwarf but may still get a little larger or have a bit of a trailing habit. I recommend to start with the smallest cultivars you can find, because light requirements won't be as high.

Here are few cultivars for you to look for (but you'll find more once you start seed hunting)

  • 'Micro Tom'
  • 'Micro Tina'
  • 'Red Robin'
  • 'Tiny Tim' (heirloom)
  • 'Bonsai'
  • 'Red Velvet' F1
  • 'Cocoa' F1
  • Heartbreakers tm 'Dora Red' (plants are a bit taller or trailing)
  • 'Pigmy'
  • 'Vilma'
  • 'Little Red Riding Hood'
  • 'Mohamed'
  • 'Lil' Peeps'
  • Ponchi tm series, with cultivars Do, Re, Mi & Fa
Starting tomato seeds in a plug tray with humidity dome

Starting tomato seeds in a plug tray with humidity dome
PC: Leslie F. Halleck

Step 2: CHOOSE OR MIX GROWING MEDIA

First, let's start with the substrate in which your seedlings need to germinate and grow. It’s best to choose a lightweight moisture-retaining mix that specially formulated for seed-starting, or you can use any number of other inert growing media to start your seeds (coir discs, Oasis, rockwool, foam plugs, etc.).

If you’d like to learn more about the types of ready-to-use substrates and containers, making your own paper pots and more, you can use to grow seedlings, check out the Materials and Tools chapter in my book “Plant Parenting”.

Individual coir biodegradable plugs in a water-tight tray

Individual coir biodegradable plugs in a water-tight tray
PC: Leslie F. Halleck

You can also mix your own seedling mix using some peat-free coir (coconut husk fiber), which you can buy as compressed bricks or discs to save space. You can aerate the mix a bit with a little perlite. Traditionally seed starting mixes also contain horticultural vermiculite. You do not need to worry about adding in any fertilizer, compost, or worm castings at the start. Your seedlings will get all their nutrients from the seed for the first couple of weeks. We'll talk about feeding your seedings coming up.

A conventional seed starting mix recipe is 1 equal part each of Peat: Perlite: Vermiculite - but I try and stay away from peat and instead use coir. If you can't find vermiculite you'll be find with just the coir and perlite.

To hydrate compressed coir:

  • Gather a mixing bowl and several peat-free compressed soil discs, or a brick. Some coir products may also contain worm castings and water-retaining crystals, so make sure to read the label to see what the ingredients are that you may or may not want.
    • Put the coir discs or brick in the bowl and add water
    • Use fork or small garden tools to mix and fluff up the moistened growing mix.
    • Once the coir has absorbed the water and expanded you can mix it with your other ingredients, and then add it to a small 2-inch pot, small compostable fiber seedling pot for seed starting, or whatever containers you're using to hold your seedlings.

You can also follow the chapter on Starting Your Seeds in "Plant Parenting" for more in-depth step-by-step instructions on any of your seed starting projects.

Coir that has absorbed water and is ready for use

OR, if you don't want to use materials such plastic or paper for your pots, and you're focused on reducing waste, use a soil block with whatever growing media you are using to make your own pot-less seed starting cubes. Simply place the soil cubes directly into a water-tight tray (I show you how in "Plant Parenting").

Soil blocker for potless seedlings

Soil blocker for potless seedlings
PC: Leslie F. Halleck

Step 3: LET’S GERMINATE!

Now that you’ve created a good foundation for your seedlings it’s time to plant your seeds!

  • Carefully remove seeds from the packet. Micro tomato seeds are very small so you may want to set a a dark piece of paper down under your seed packet so you can see if any fall loose. Keep the packet so you have a record of what you're growing and any handy instructions.
  • Gently press one seed ¼-½” into the growing mix in each pot and cover with the mix. Normally, I like to plant two seeds per pot, just in case one seedling is week or a seed doesn't germinate. But, you usually only get a few seeds per packet with micro tomatoes, so one per pot is fine.
  • Gently water the growing media or mist with a misting bottle. Or, soak your Oasis, rockwool, or other inert media. Keep the growing media consistently moist (but not soggy wet).
  • Place the pots, pods, or other vessel you’re using into a watertight tray. If you’re using pre-filled rockwool or Oasis plugs or the like, they typically come in a watertight tray already. You may not need to for successful germination and seedling growth, but if your home is particularly dry with very low humidity, you’ll have more germination success by temporarily placing your seeds under a humidity dome, or simply placing an individual clear sandwich bag (preferably compostable!) over each pot if you’re only starting a few pots.
  • If you’re germinating seeds in cold months, your seedlings will get off to a much stronger and faster start if you use a seedling heat mat under the tray. This will warm the root-zone temperature and speed up germination and growth.
  • Watering: keep the growing mix consistently and evenly moist (think the moistness of a wrung out sponge). Tomatoes thrive with even moisture with good air circulation around their roots – they don't like "wet feet"! Keep this consistent moisture until harvest.

*Micro tomatoes are pretty small plants. Depending on how much light your plants receive and your growing environment, it’s possible you could grow them to harvest in the same pot in which you germinated the seeds – it just depends on the size. Or you may want to transplant them into a 6” pot, which I’ll teach you about here coming up.

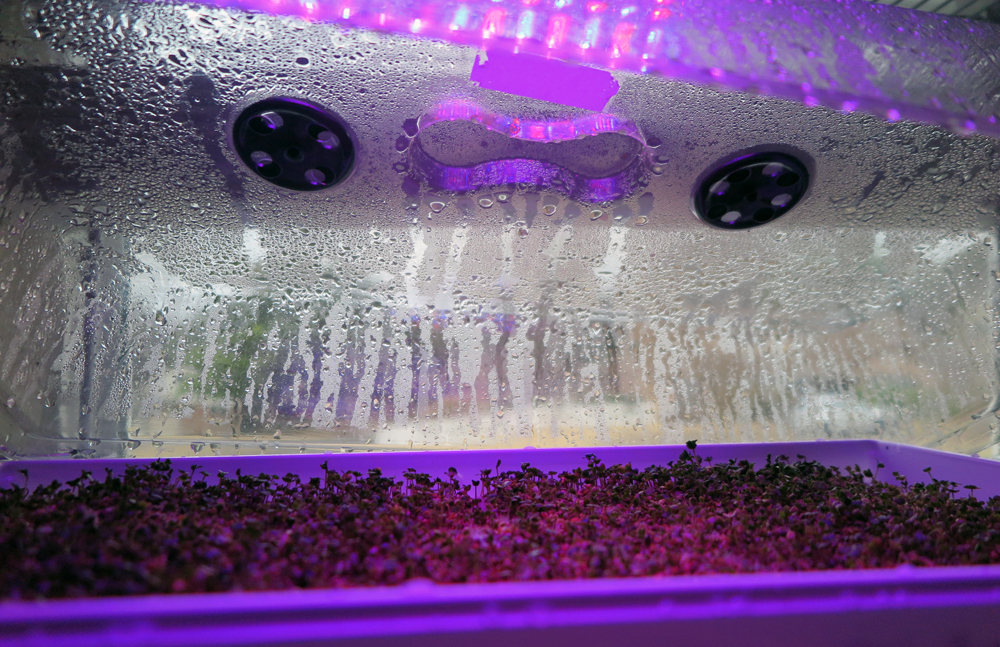
Seedlings under a humidity dome, and on top of a seedling heat mat

Seedlings under a humidity dome, and on top of a seedling heat mat
PC: Leslie F. Halleck

Step 4: BRIGHTEN UP! How much light to start?

Even if you are growing dwarf tomatoes in a bright window, they’ll typically need more intense light to thrive than your windowsill provides. Here are some basic lighting guidelines if you are using a 20W full spectrum LED grow light*. Typically, this small type of LED will support one dwarf tomato plant if it's a spotlight, or 1-3 plants if it's a bar. But that always depends on how much ambient light you do, or don't, have in your space.

Everyone’s growing environment is different. Observe your plant closely and be ready to adjust your lighting if needed. If plants begin stretching you can move your grow light closer to the plant to increase intensity and light quantity. If plants are yellowing or burning raise up the grow light a little farther from your plant.

When growing tomatoes from seed, you can expect to harvest mature fruits anywhere from about 90-112 days from when you plant the seed, or 50-60 days from when you transplant a seedling. Each cultivar will have slightly different days-to-maturity, which will be listed on the seed pack, but can differ depending on growing conditions and temperature. Plants grown in cooler temperatures will develop more slowly, whereas plants in warmer temperatures can develop faster.

  • Seedling Week 2-5: DLI (Daily Light Integral): 15 Mol/m2/day
    • As soon as you see germination occurring make sure you grow light is on. This is one of the worst times for your seedling to not have enough light, as overstretched seedlings are often doomed! Germination usually occurs between 7-10 days, depending on home temperature. Warmer temperatures will speed germination (this is where a seed het mat helps).
    • Place your 20W lamp 12” above your seedling pot and run your lamp for 12 hours.
    • This will give your seedling a PPFD of approximately 200-300 umol/m2/s, which is ideal for this stage of seedling growth, and the target DLI.

*These are approximations based on output of quality 20W LED grow lights in the 3000-3800k range. Actual output and intensity at different distances will vary by grow lamp and be impacted by the amount of natural light in your space. You may be able to run your lamps for less time inf a southern window for example, or you may have to run them longer in a darker area of your home.

Generally, I'd recommend at least bumping to a 30-32 watt spotlight LED for your miniature tomato plant, as you'll likely get more fruit! If you bump from a 20-watt to a 32-watt, you may be able to run your lamp for a shorter time, or raise it a bit higher above your plants. I do like the 32-watt GE grow bulbs you can screw into any fixture - they are available in both a cooler and warmer spectrum, that you can switch between for different phases of leafy to fruity growth.

Learn a bit more about how much light your tiny tomatoes need, and more on how to stage and stagger the lighting schedule and spectrum as plants mature HERE.

32-watt spotlight LED grow Light

32-watt spotlight LED grow Light
PC: Leslie F. Halleck

Step 5: FEED YOUR BABIES

About two to three weeks after seedling germination, when your seedlings have their first set of true leaves, you'll need to apply some fertilizer. It's at this stage the seedling is beginning to grow the tiny root hairs that absorb water and nutrients. But again, micro tomatoes are pretty small plants, so don't go crazy with fertilizer - either too strong or too much. Look for all natural or organic vegetable or tomato fertilizers with a lower nitrogen content – something with a guaranteed analysis of around 3-4-6 N-P-K works well. If your plants look a little pale or lack vigor, bump to something similar to a 6-12-6 N-P-K (This is a balance I use quite often in a liquid feed).

If you use a low nitrogen synthetic granular fertilizer, you’ll apply it once every couple of weeks by watering it into the growing media. However, if you are using a slow-release granular synthetic, you may only need to apply it once or twice total. Granular feeds are applied as a side-dressing, or simply sprinkling into the top of the growing media.

I find with tiny tomatoes using a liquid fertilizer that has some water-soluble nutrients available is preferred. Remember that if you’re using a granular or powered fertilizer, check the label – if it does not have a guaranteed analysis of available nutrients, then you should consider it more of a soil conditioner (rather than a fertilizer) that needs to break down over time before it will provide nutrients to your plants. Given tiny tomatoes are a relatively short crop, you probably need something that works a little faster, but is still gentle.

If you’re using a liquid fertilizer, you can apply it weekly until harvest, but make sure you follow the label mixing instructions and you do not use too much.

Here is an example of an organic granular fertilizer, Tomato tone, that does have a small amount available water soluble nitrogen that can be taken up by your plants right away. Always read the label!
PC: The Espoma Company

Step 6: HEALTH CHECK

When you grow any plants indoors, you’re essentially creating the perfect environment for pest or disease issues to grow out of control. You’ll need to regularly check for signs of common diseases such as powdery mildew, leaf mold, leaf spot, and even root rot, which can affect your tomato plants. Other pests include spider mites, mealybugs, and aphids. Typically plants that get enough light indoors and don’t stay too wet shouldn’t have much disease or pest pressure, but low humidity can often encourage spider mites on tomato plants.

You may need to use a pest control treatment, but remember you're growing edible plants! Do not use any sort of systemic pesticide. Stick to mild natural topical treatments, such as insecticidal soap or horticultural oils. Sticky traps can help you monitor pest populations and manage some of the adults insects and mites. I go into more detail on pest management in both my books "Gardening Under Lights" and "Plant Parenting".

Yellow Sticky Traps

Yellow Sticky Traps
PC: Leslie F. Halleck

Step 7: POTUP & VEG OUT…Let's boost the light!

VEG OUT: As your tomato plants grow, you’ll need to increase the amount of light they are getting so they can put on more vegetative growth (stems and foliage) to support the coming flowers and fruits). . You can do this pretty easily by simply lowering your grow light so it’s a bit closer to your plants. Or you can also prop your pots up to be closer to the light if you can’t move it.

  • Vegetative Phase Week 5-9: DLI 18-20 Mol/m2/day
    • Place your grow light about 8-9 inches above your plants and rune the lamp 13-14 hours
    • This will give your seedling a PPFD of approximately 400-600 umol/m2/s

Step 8: POT UP? Week 5-6

Is it time to repot your seedlings? It's usually a good idea to bump your micro tomatoes up to a slightly larger pot...but not too big. Micro tomatoes are pretty small plants. Depending on how much light your plants receive and your growing environment, it’s possible you could grow them to harvest in these same pots you started your seeds in, especially if they were 3-4" sized pots. It However, if you started your seeds in tiny plug trays, then you'll need to repot them. Otherwise, roots become restricted and plant growth is stunted.

Depending on conditions, especially if you're provided enough light, you may have seedlings that grew vigorously and have already rooted out to the bottom of the plug or pot before week 5 - keep an eye on your seedlings as they may need repotting a bit sooner. Once roots have reached the bottom of the pot or plug, it's time to bump it up! (no larger than 6” diameter is necessary to finish most micro tomatoes).

Transplant your tomatoes into their new pot with a lightweight indoor potting mix. You can choose a premixed indoor potting mix or lightweight mix for vegetables and herbs. Just stay away from heavier chunkier mixes that contain a lot of bark or lots of organic matter - these are best for your outdoor plantings.

How To Transplant:

  • Fill your 5-6"pot halfway with lightly moistened potting mix.
  • Take your transplant and gently squeeze the plug on both sides to loosen the roots (if you've used expanding loose coir plugs, oasis, or rockwool you don't need to do this).
  • Tip the plant towards your hand and gently slide the pot away from the root ball. Try to disturb the root system as little as possible, as these are small plants. If it's stuck, you can stick the tip of a pencil through the bottom plug hole to nudge the seedling out.
  • Set your tomato plant on top of the potting mix in the pot.
  • Backfill with additional potting mix around the transplant’s root ball.
  • With tomato plants it’s ok to add potting soil so that it covers some of the base of the main stem. Meaning, it’s ok, and often beneficial, to plant tomatoes a little deeper than where they originally emerged as a seedling. (note, not all plants can tolerate deeper planting and often recommend the opposite!)
  • Lightly press potting mix around the plant to stabilize it.
  • Lightly water the container so there is even moisture, and some water comes out of the bottom of the container.

Tomato Care Reminder: Don’t forget to Fertilize! Side dress with a granular fertilizer now, or use a liquid fertilizer.

'Red Robin' seedling in a 2" pot, this seedling will need to be transplanted into a 5-6 " pot for finishing.  If you look closely, you'll see this tiny tomato is already developing flower buds!

'Red Robin' seedling in a 2" pot, this seedling will need to be transplanted into a 5-6 " pot for finishing. If you look closely, you'll see this tiny tomato is already developing flower buds!
PC: Leslie F. Halleck


Tip: if you'd like to try and keep your tiny tomatoes for a second harvest, it's a good idea to bump them up to a 1-gallon sized container, especially if the root system is getting too big for the current pot.


Step 9: ILLUMINATE YOUR HARVEST How much light for flowers & fruits?

Remember, tomatoes are full sun loving plants. Making flowers and fruits takes a lot of energy. So now is when you want to try and deliver the equivalent of full sunlight to your tiny tomato plant. Remember, you can do this easily by simply lowering your grow light so it’s a bit closer to your plants. Or you can also prop your pots up to be closer to the light if you can’t move it.

  • Flowering & Fruiting Weeks 9-14: DLI 30 Mol/m2/day
    • Place your grow light about 6-8 inches above your plants and run the lamp for 14 hours.
    • This will give your seedling a PPFD of approximately 600-900 umol/m2/s, which is ideal for this stage of development, with the target DLI.

*These are approximations based on output of quality 20W LED grow lights in the 3000-3800k range. And again, this is for one plant, not a group of plants over a larger surface area. Actual output and intensity at different distances will vary by grow lamp and be impacted by the amount of natural light in your space. You may be able to run your lamps for less time inf a southern window for example, or you may have to run them longer in a darker area of your home.

Be sure to observe your plant and make lighting adjustments as needed. If your plant looks like it’s stretching move your grow light closer to the plant. If it appears to be yellowing or burning raise up the grow light a little farther from your plant.

Step 10: HARVEST & ENJOY!

Once your tiny tomatoes are ripe it’s time to pick and eat. One thing to know about micro tomato cultivars is that most of them are determinate, meaning they’ll set most all of their fruit at once, or in a short period of time…and then plants may “crash”. They could collapse and die, or if you’re practiced in tomato growing and you catch plants soon enough, you can cut them back, fertilizer them, and see if they’ll regrow successfully for you. Don’t be sad if they don’t, it’s just a normal cycle for these plants. If your tiny tomato plant crashes after it produces fruit, just start another seedling! That’s really the fun of it anyway, right?

Cherry tomato harvest

Cherry tomato harvest
PC: Leslie F. Halleck

This post is not sponsored, does not contain any paid advertising, nor any free products for endorsement...because I don't do that stuff! Any products mentioned are simply items I use or made a good example for this project.


Botany 101: What is a Perfect Flower?

December 31, 2023

Parts of a Perfect Flower

Did you know? Sexually speaking, there are different types of flowers that are capable, or incapable, of different reproductive functions.

Understanding some basic flower morphology and anatomy can come in handy if you're trying to pollinate, or hybridize, your own plants to generate seeds you can collect and grow. Not all plants have the same types of flowers, nor contain the same "parts". Some of the easiest plants for you to pollinate are "monoecious" plants with "perfect" flowers.

PC: Illustration by Leslie F. Halleck

Parts of a Perfect Flower

The easiest way for me to teach this is usually just to create an illustration! So that's what I did this morning for you with this drawing of a lily flower from a bouquet that's currently sitting on my kitchen table.

A "perfect flower" is a common term used to describe bisexual flowers; flowers having both ovule-producing ("female") parts AND pollen-producing ("male") parts within the same flower.

The female organs are collectively referred to as the "pistil" and the male parts collectively as the "stamen".

When a single plant produces both pollen and ovules (be it on "perfect" or "imperfect" flowers, which will get to in another post), it is called monoecious (from the Greek "one house").

A monoecious plant with perfect (or imperfect) flowers needs pollen from either the male parts of the same flower, or another flower on the same plant, OR another plant of the same compatible species in order to germinate the ovary, which is located at the bottom of the pistil.

Many of these plants can easily self-pollenate, and we refer to such plants as "self fertile". Some, however, have adapted morphology that encourages "outcrossing", or getting pollen from another flower, or a flower on another compatible species before successful germination can occur.


Plant Pests: Houseplant Sticky Traps

December 27, 2023

Ooooo those pesky fungus gnats!

I JUST spotted a fungus gnat on one of my houseplants. Time to break out some good old sticky traps! Flighting fungus gnats (and other flying plant pests such as whiteflies) involves both monitoring and population reduction methods. In greenhouse production, sticky traps are a standard go-to for monitoring pest populations. But they are just as handy for the home plant parent.

Sticky traps are an easy low-impact way to knock out the adult fungus gnats currently flying around your plant, as well as prevent them from laying more eggs in the plant’s growing media. Those larvae that hatch out around your plant roots will want to munch on organic matter. If there isn’t any in your container, that leaves your plant roots!

PC: Leslie F. Halleck

I usually apply a diluted soil drench of hydrogen peroxide to knock out the larvae (I use a 10:1 ratio of 3% HP to Water - it seems to be a really heavy infestation you can go a bit stronger). and then you may try Bt (Bacillius thuriengensis) for longer term control or prevention.

I have some handy pest and disease charts as well as control methods in my books “Gardening Under Lights” and “Plant Parenting” if you need a good walk through and reference always at your fingertips.

PC: Leslie F. Halleck


Back to top

Tips in your inbox

E-Newsletter

Sign up for my monthly E-Newsletter for botanical business news, horticulture courses, and tidbits for plant and gardening lovers!