Looking for a heat and drought tolerant perennial?

October 10, 2011

I get asked daily about what people can plant in their gardens here in Texas that will be low-maintenance, drought and heat tolerant, bloom with ease and tolerate some shade. There are not a lot of plants that fit that bill. If you're asking yourself that question and you want to plant right now (because it's PERFECT planting weather), then, WELL...what about Daffodils?

Yes, daffodils. I know, most of you will probably say, "but, daffodils are bulbs...". And you're right, they are bulbs. But they are also really tough drought tolerant perennials that can be planted in areas that receive some shade. They are especially great under deciduous trees, because they'll receive plenty of direct light while they are growing and before the trees leaf out.

The type of daffodils that typically perform best in the heat and humidity of the South are most of the Jonquil hybrids, however most Narcissus do very well. You'll find that the classic Trumpeted types are the group that tend to be least-adapted in terms of multiplying or long-term perennialization. The large- and small-cupped types do better.

Some of my favorites include 'Quail', N. bulbicodium, 'Jetfire', 'Hawera', and 'Thalia'. I also love the pinky/peach cupped varieties like 'Precocious' and 'Pink Charm', not to mention some of the fun split-corona types like 'Orangery'.

October-December is prime time to plant your daffodil bulbs in Texas. When you do plant, plant them deep! You'll find they are happiest when planted about 8"-12"inches deep, as the bulbs/roots like the cooler soil temperatures. Plus, this allows you to plant some seasonal color, like violas, right on top of them. The exception to this would be the mini-daffodils which have much smaller bulbs -they can be planted 4"-6" deep, so they are perfect for tucking in around already established perennials.

Mix some bulb-food in with the soil when you plant and water in. In the spring, after blooming, you'll want to allow the foliage to continue to grow, until the leaves start to fade and flop over, then you can cut the foliage down, but not before. Feed your established bulbs just after they finish blooming each year with a bulb food.

Daffodils will go dormant by the time summer comes around...so they won't even notice that the rest of us are baking away in the heat!


Woolly Pockets planted up!

October 9, 2011

Yesterday morning I mounted and planted up two brown Woolly Pocket planters on my dining room wall. If you're in the Dallas area, you can get them at North Haven Gardens.

Woolly_project
They look pretty fab already, but I imagine once the plants fill in more it will look even better. You'll want to use a mixture of plants that will provide some height, some fill with texture and foliage color, and some trailers that will eventually grow to cover much of the planter. For indoors, I suggest sticking to tropicals that can handle lower light conditions. You can even do African violets, orchids and the like as long as you have a nice bright North or South facing window. If you want to grow more blooming color, herbs or veggies then you'll want to mount your Woolly Pocket outside. In Texas, I DO NOT suggest trying to maintain wall planters like this on a West facing wall or spot that gets sun most of the day...Maintaining adequate moisture could be pretty problematic. Morning to mid-day sun with a few hours of afternoon shade would work best.

Woolly_pocket
I placed the planters on a wall that faces a North facing window, so they get lots of bright ligh (but no direct sun rays) all day. I used North Haven Gardens Premium Organic Potting Soil, which is a mix I created. This is a medium to heavier weight mix with some expanded shale. Even though a peat based indoor potting mix would be lighter, I felt that due to the wicking action of the planters, too much peat could dry too quickly and be difficult to rehydrate. Make sure to put down a drop cloth of some sort...you will make a mess, lol. I planted with several trailing Philodendrons, a large purple Philo, Prayer plant, and several types of ferns. All of these species will appreciate the light exposure and do well with an air root-prunign type container such as the woolly pocket.

Woolly_pocket1
I mounted two pockets using the dry wall brackets included, in an overlapping fashion so you wouldn't see the bottom brackets or wall-space. Filled 1/2 way with soil, then went about arranging the plants. Make sure to wet the rootballs before you plant. Top-dress with potting soil but make sure you leave at least 1/2-1" clearance to the top edge of the pocket.

Water_woolly
When you water, make sure to apply the water to the "tongue" of the planter, not directly to the soil. I used my small copper watering can because the spout is tiny and can deliver just enough, but not too much. water to the planter. The water will wick down and be pulled up by the plants through the "fabric". Don't ever apply more than 3 cups of water in one application.

Mister
You might also consider keeping a plant mister on hand as these types of tropicals do like a bit of extra humidity. Don't apply too much water to the foliage this way or you'll end up with water drips on your wall or floor.

Just remember, while you may see photos of this planter online, planted up indoors with herbs and edibles, realize that plants like that requiring a lot of direct sun won't sustain indoors more than a few weeks...stick to tropicals indoors and edibles outdoors. If you mount a substantial grow light over the planters, then you could probably get away with salad greens and some herbs indoors.

I have a feeling that I'm going to have to put up several more of these in my house...they are my favorite new gardening product and I think they are especially perfect for those who have limited garden space, live in a condo or apartment or want an easier way to display plants indoors. I've already had a few friends request them as Xmas presents! Guess I'd better get to work...


Rain Lillies Blooming!

September 14, 2011

Ok, it's officially Fall. I realize "official fall" is still another week away, but the rain lillies are blooming and that's always my signal that fall is here. Actually, they started blooming 3 or 4 days ago in my garden. I have a number of small clumps of white, copper and a couple of other colors, transplanted from the garden at my previous house.

Rainlily

Zephyranthes candida

It means the night temperatures are coming down and barometric pressure is changing, favoring rain. And sure enough, we got some rain today. Isn't nature cool?!


FINALLY, the new baby chicks have moved outside…

September 8, 2011

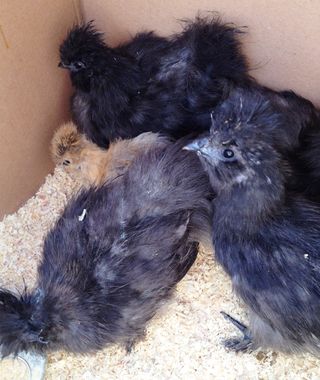
You might remember me posting about the surprise packet of three baby chicks that showed up the week of July 4th...Well, due to the extreme heat this summer, they've been living in my upstairs office up until just this last weekend!


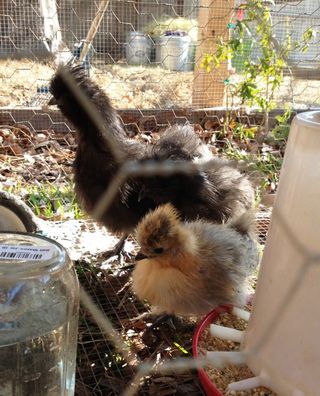
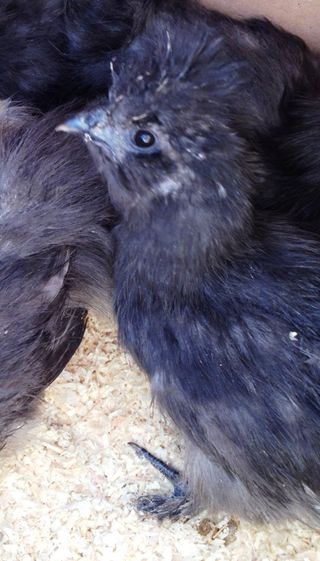
I am SO glad to have finally moved them outside with this break in the weather. They are much happier as well..They were such a cute bunch of chicks and are growing into quite lovely specimens. The Cochin has turned out to be black, as well as the Polish you see behind her. I haven't named these two yet, well, because you just never know what will happen...

Here is the Silver( blue) white-crested Polish...she looks just like Phyllis, so we're calling her Phyllis Jr. lol..She is a HANDFULL. Quite animated and likes to get into trouble. I'm really hoping she doesn't turn out to be a HE...the hairdo is a bit more spiky and swept back, which tends to be an indicator of a male, versus females, which have a more rounded fluffy head of hair. We'll see, fingers crossed.

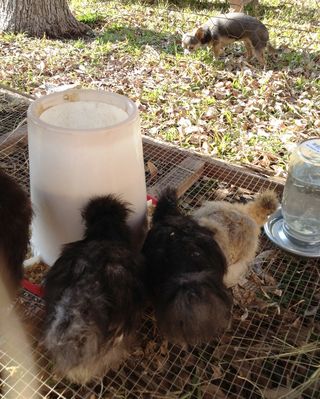
They are set up in the separate A-frame chicken tractor until they get bigger. The older girls have been dying to get at them and are fascinated...We'll keep them housed separately until they are close to equal in size to the existing flock.


Off to Ecuador!

August 10, 2011

Travel alert: I will be running off to Ecuador Friday morning. I'll be flying into the capital city of Quito and then heading off to Banos, a city that sits on active volcanoes…Yay! I'm not sure exactly what I'll be doing the week that I'll be there, but I'm sure it will be fun. On Saturday, when Dallas breaks the all time record for consecutive days above 100F, I will be waking up to a 50F morning followed by a 70F day. Aaahhhhhh, thank you mountains. Who knew you had to go South to get away from this horrible heat?

Map of Ecuador

I'm looking to hit some Volcanic baths, do some hiking in the national park that surrounds the volcano and…well, maybe a whole lotta nuthin’. If inspired, I may also head down to Cuenca. The architecture in Quito and Cuenca is supposed to be amazing. Banos will provide the beautiful landscapes. In any case, you can look forward to posts and photos of the adventure. Believe it or not, I’m skipping TWO work conferences next week, one in Chicago, to go on this trip. UNBELIEVABLE. And I’m patting myself on the back for it, lol.

Tungurahua Eruption 2011 - photo courtesy of The Telegraph

I spent two weeks in the Amazon jungle in Peru in December of ’09 and it was amazing. This trip to Ecuador will much less of a “back woods roughing it” kind of trip, but I’m really looking forward to seeing such a beautiful country. Hopefully, Tungurahua, or “Throat of Fire”, will cooperate while I'm are there…


Proper watering in this Texas heat!

August 3, 2011

We are experiencing record heat and drought. As a result, many established trees, shrubs and lawns are suffering. Plants may look chlorotic or even losing leaves. Especially new plantings (1-2 years old), or less adapted plants such as Japanese maples or Dogwoods. If you think you can't lose a large established shade tree in this weather, think again. Not to mention, the stress of this drought will effect the tree's health for years to come and has a compounding effect.

Frequent,shallow watering contributes significantly to plant stress this time of year. Watering your established turf and landscape for 5-10 minutes a day is the absolute WRONG way to water. Established plantings need 1" worth of water weekly. A deep watering 1-2 times per week is much more effective than a short, daily watering, which will damage root systems and waste water to evaporation.

Realize, of course, that smaller herbaceous plants and annuals will require supplemental hand watering in addition to your sprinkler system, because they have much smaller and shallower root systems.

New plantings will require supplemental watering in addition to your sprinkler system. Water should saturate at least 6" deep. Gator bags are a great way to keep newly planting trees watered.

Some people promote that you should stop watering all together during a drought like this. Problem is, allowing shade trees and shrubs to die will only result in massive increases in energy usage to cool your home. Allowing turf to die will result in soil erosion. Replacing the plant material, which is ineveitable, will cost more in $ and resources to get the new plants established. Watering properly will cut down on waste and preserve the landscape we have.

Remember, DFW is not a desert climate. It is grassland prairie and Eastern hardwood forest. Planting "desert" plants won't solve your problem. The 20" of rain we can get in the spring, or the 10" we get in fall, will rot those plants quickly. Not watering will not help in the advancing desertification process that we are starting to experience in Texas, it will only make it worse. Cities feel the heat worse due to the high concentration of contrete and metal which can raise our temps a good 10-15 degrees. Shade trees and shrub/turf plantings are key to holding down temperatures, reducing cooling costs and reducing pollution.

Mind your watering restrictions where you live. Even if you are only allowed to water once per week, one solid deep watering per week is enough to keep your established landscape healthy. 10 mintues won't do the job.

Addendum: So how long to water your landscape?

It really depends on your individual landscape, irrigation system, hand watering etc. The easiest way to "audit" how much you need to water in order to get the equivalent of 1" worth of rainfall per week, is to get several tuna cans and place them in different areas of your sprinkler zone - or where you put out sprinklers. Run the irrigation until you get 1" of water in the can. That's how long you'll need to run it. HOWEVER, in very dry or clay compacted soils, sometimes your landscape can't take in that much water at once without run off. So you may have to split the time into 2 cycles. For example, if you see run off after 20 min, but you've only got 1/2" of water in the can, then what you'll want to do is irrigate for 20 min, then let it rest, then wait about 1 hour and do the remaining 20 min (so an A and B cycle on your system) or split up your hand watering.

When it comes to using soaker hoses or drip irrigation, you have to run those systems much, much longer. That's a big mistake people make with soaker hoses - they run them for the same time they would a sprinkler, which will result in even less saturation. Soaker/drip systems put out a much lower volume of water, but over a longer period of time, which can really reduce waste and help plants absorb all the water they need. But if you run your sprinkler for an hour, you may need to run the soakers for about 6 hours. You'll just need to see how long it takes to saturate at least the top 6" of soil.


Baby Chicks First Outside Adventure

July 25, 2011

The New Chicks Venture Outdoors for the First Time

I took the new baby girls outside for the firs time...They got a little rowdy, so we didn't stay out there long (it's kinda hard to catch these little munchkins once they decide to run, lol). There are two Polish hens and one Cochin. Looks like the black white-crested Polish is actually turning into a speckled, but the Blue looks like she's going to be a lovely color - even her legs are turnig silver. I was hoping for a Blue Cochin, but she's turing out to be a black (you only end up with 25% actual "blues" with any breed, so you end up with the rest being black or speckled, which are both still pretty). Too cute!

Babychick_polishblue
Blue Polish chick

Babychick_polishblack
Black (or speckled) white crested Polish chick

Babychick_blackcohcin
Black Cochin chick


Honey extraction…first year

July 23, 2011

So, this morning we extracted honey from one of our backyard hives. We didn't even take the whole super's worth of frames, we left a few behind and only extracted from about 6 frames. Here are some photos of the process...

Opening_hive
Here is me using the the bump and brush method, after a little smoking, to remove the bees from the honey super.

Brushing_bees1
They are not happy about getting brushed off their honey frames...after we collected all the frames we wanted to harvest, we put them into another waiting empty super and slipped it inside a plastic bag for transport to the honey house.

Hotknife_oncomb
Here I am at the honey house using the hot knife to remove the beeswax capping from the honey comb. You basically slice off the capping and collect it in a tray below (you'll save this wax and honey for later...it's yummy!)

Wax_offcomb
A close up of the wax capping coming off the honey comb...

Breaking_comb2
Then, you use a metal comb to break open any remaining cell not opened by the hot knife...

Frames_spinner
The frames are then carefully placed inside an extractor, which is basically like a large centrifuge that spins out all the honey at high speed.

Honey_extraction
The honey drains out of the extractor into a food-grade plastic collecting bucket, filtered by two metal sieves and a straining cloth. So pretty!

Honey_filter
Excess honey is squeezed out of the straining cloth...

Honey_firstyear
And here is our beautiful honey! We didn't end up with a great quantity, but from only 6 frames we got about a gallon and a half of beautiful golden honey. It is very thick with a wonderful floral flavor. We tested the moisture content and it measured 17%. A good quality honey shouldn't have more than 18% and preferably a little less. Too much moisture in the honey means your honey can ferment later on, plus it makes it thin. With the drought this year, it's no surprise we came in at 17%. While the drought keeps us from getting as much honey, the honey we get is of higher quality. The bees will usually tell you themselves when your honey is at the right moisture content for harvesting, because they will cap it off between 17%-18%.

And don't forget that bonus honey and comb...I jarred it up...it's like candy!

Honey_comb
I'll be jarring up some of our "Sweet Beez Backard Honey" for family and a few friends over the next week. Looking forward to a big harvest next year!


Back to top

Tips in your inbox

E-Newsletter

Sign up for my monthly E-Newsletter for botanical business news, horticulture courses, and tidbits for plant and gardening lovers!