10 Steps to Grow Tiny Tomatoes Indoors from Seed to Harvest
January 3, 2024
Grow Tiny Tomatoes Indoors Step by Step
If you wish you could grow tomatoes indoors, then I suggest starting small! Micro tomatoes, also called microdwarfs, such as 'Micro Tom', are really the easiest types of tomatoes to grow indoors, and a great place for beginners to start. Larger and slicing tomatoes require a lot of light...a DLI (daily light integral) of about 25-30 Mol/m2/day. That's tough to achieve indoors unless you're using higher powered HID (high intensity discharge) lighting. Usually large LED panels or LEC grow lights. I grow mine using HID lighting in grow tents. But most of us don't have space for that kind of setup, nor want to invest in it. But if you have a little space to dedicate to one to three miniature tomato plants, you can harvest some tasty cherry tomatoes using lower output grow lights.
Step 1: CHOOSE YOUR SEED
Luckily there are many more types of dwarf tomatoes on the market these days for you to choose from. Make sure to read the cultivar descriptions so you can pick the ones you're most interested in, depending on size, form, flavor, and color. Some will fit your space better than others. Some are true micros, while others are miniature or dwarf but may still get a little larger or have a bit of a trailing habit. I recommend to start with the smallest cultivars you can find, because light requirements won't be as high.
Here are few cultivars for you to look for (but you'll find more once you start seed hunting)
- 'Micro Tom'
- 'Micro Tina'
- 'Red Robin'
- 'Tiny Tim' (heirloom)
- 'Bonsai'
- 'Red Velvet' F1
- 'Cocoa' F1
- Heartbreakers tm 'Dora Red' (plants are a bit taller or trailing)
- 'Pigmy'
- 'Vilma'
- 'Little Red Riding Hood'
- 'Mohamed'
- 'Lil' Peeps'
- Ponchi tm series, with cultivars Do, Re, Mi & Fa
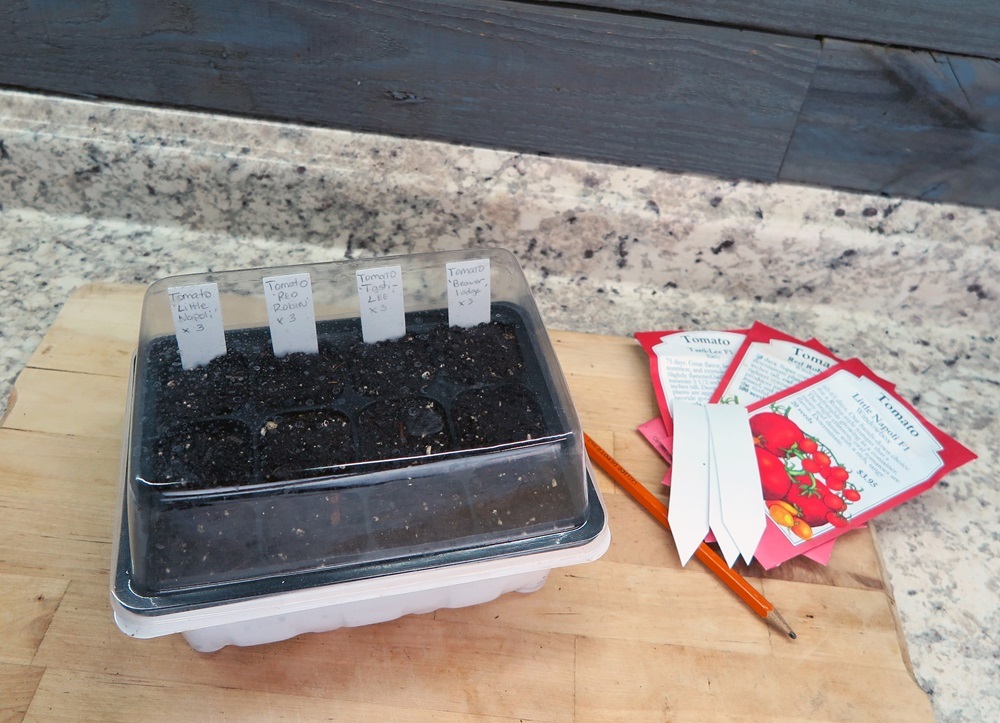
Starting tomato seeds in a plug tray with humidity dome
PC: Leslie F. Halleck
Step 2: CHOOSE OR MIX GROWING MEDIA
First, let's start with the substrate in which your seedlings need to germinate and grow. It’s best to choose a lightweight moisture-retaining mix that specially formulated for seed-starting, or you can use any number of other inert growing media to start your seeds (coir discs, Oasis, rockwool, foam plugs, etc.).
If you’d like to learn more about the types of ready-to-use substrates and containers, making your own paper pots and more, you can use to grow seedlings, check out the Materials and Tools chapter in my book “Plant Parenting”.
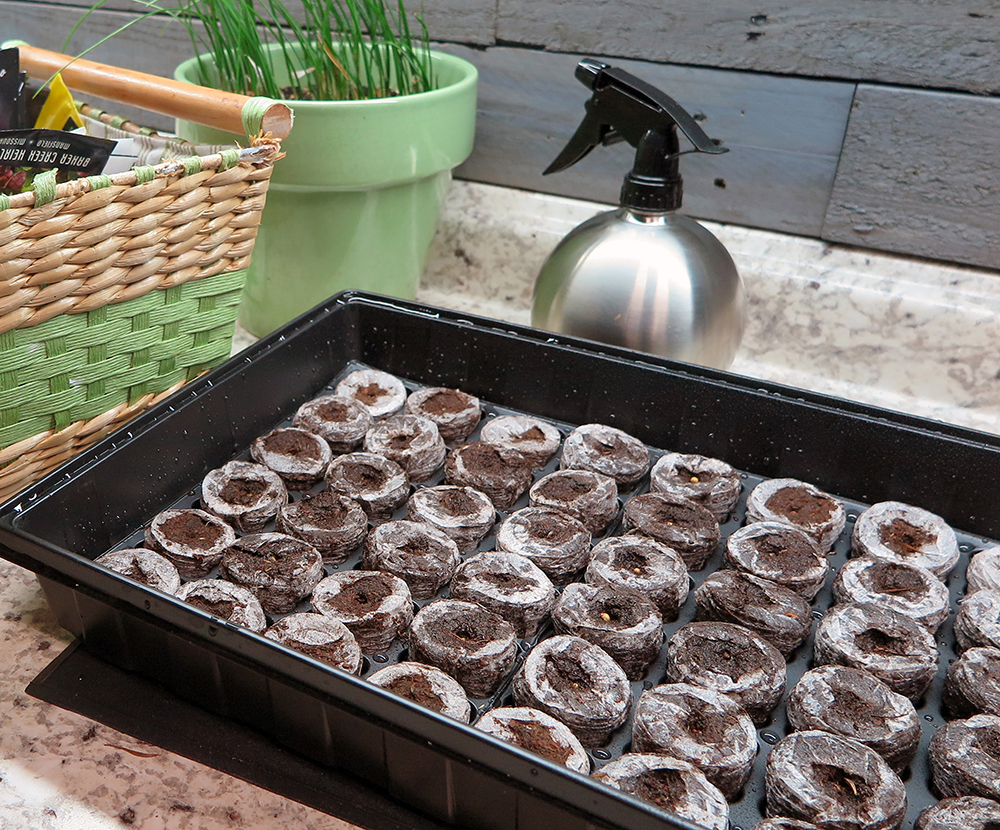
Individual coir biodegradable plugs in a water-tight tray
PC: Leslie F. Halleck
You can also mix your own seedling mix using some peat-free coir (coconut husk fiber), which you can buy as compressed bricks or discs to save space. You can aerate the mix a bit with a little perlite. Traditionally seed starting mixes also contain horticultural vermiculite. You do not need to worry about adding in any fertilizer, compost, or worm castings at the start. Your seedlings will get all their nutrients from the seed for the first couple of weeks. We'll talk about feeding your seedings coming up.
A conventional seed starting mix recipe is 1 equal part each of Peat: Perlite: Vermiculite - but I try and stay away from peat and instead use coir. If you can't find vermiculite you'll be find with just the coir and perlite.
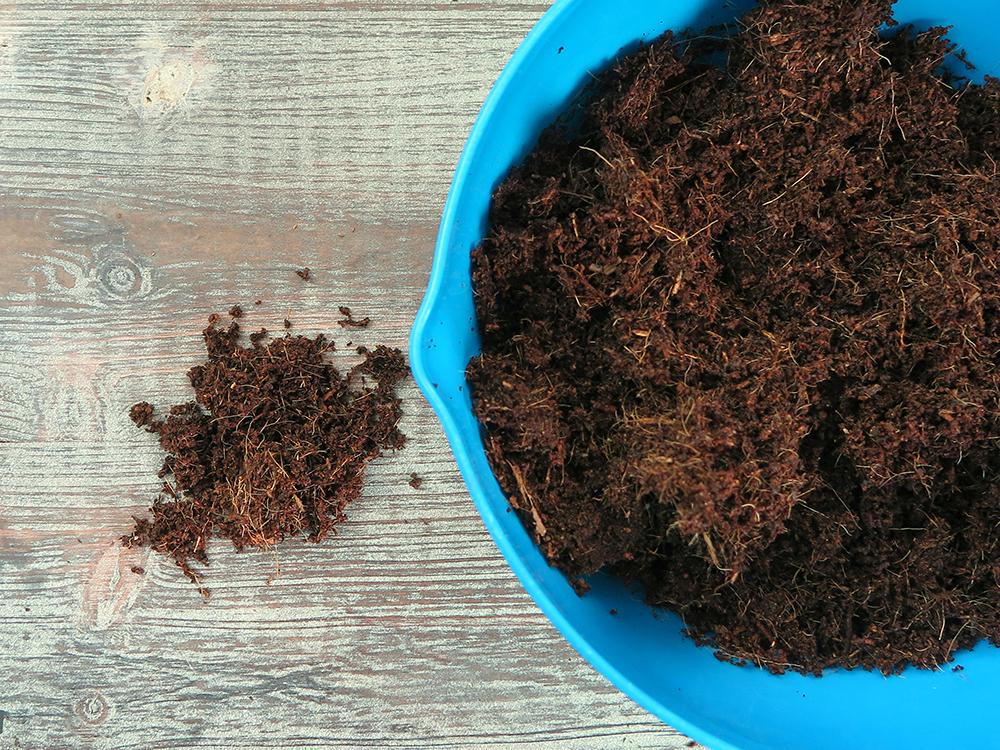
To hydrate compressed coir:
- Gather a mixing bowl and several peat-free compressed soil discs, or a brick. Some coir products may also contain worm castings and water-retaining crystals, so make sure to read the label to see what the ingredients are that you may or may not want.
- Put the coir discs or brick in the bowl and add water
- Use fork or small garden tools to mix and fluff up the moistened growing mix.
- Once the coir has absorbed the water and expanded you can mix it with your other ingredients, and then add it to a small 2-inch pot, small compostable fiber seedling pot for seed starting, or whatever containers you're using to hold your seedlings.
You can also follow the chapter on Starting Your Seeds in "Plant Parenting" for more in-depth step-by-step instructions on any of your seed starting projects.
OR, if you don't want to use materials such plastic or paper for your pots, and you're focused on reducing waste, use a soil block with whatever growing media you are using to make your own pot-less seed starting cubes. Simply place the soil cubes directly into a water-tight tray (I show you how in "Plant Parenting").
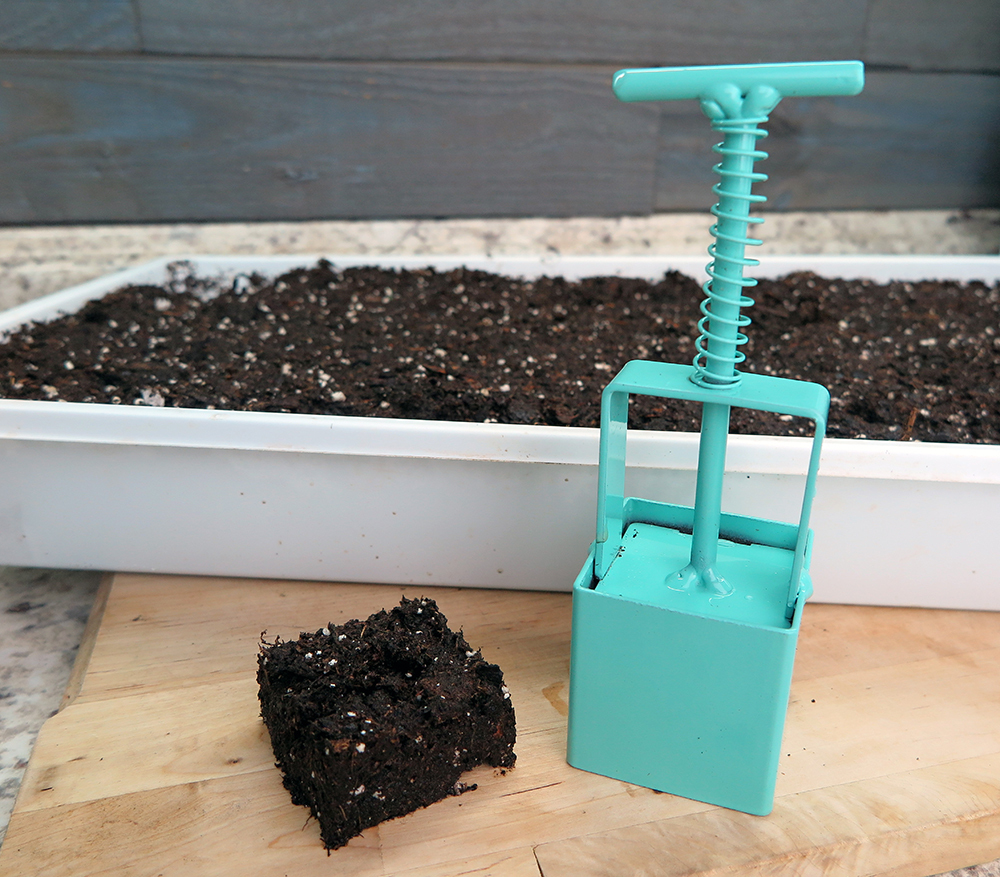
Soil blocker for potless seedlings
PC: Leslie F. Halleck
Step 3: LET’S GERMINATE!
Now that you’ve created a good foundation for your seedlings it’s time to plant your seeds!
- Carefully remove seeds from the packet. Micro tomato seeds are very small so you may want to set a a dark piece of paper down under your seed packet so you can see if any fall loose. Keep the packet so you have a record of what you're growing and any handy instructions.
- Gently press one seed ¼-½” into the growing mix in each pot and cover with the mix. Normally, I like to plant two seeds per pot, just in case one seedling is week or a seed doesn't germinate. But, you usually only get a few seeds per packet with micro tomatoes, so one per pot is fine.
- Gently water the growing media or mist with a misting bottle. Or, soak your Oasis, rockwool, or other inert media. Keep the growing media consistently moist (but not soggy wet).
- Place the pots, pods, or other vessel you’re using into a watertight tray. If you’re using pre-filled rockwool or Oasis plugs or the like, they typically come in a watertight tray already. You may not need to for successful germination and seedling growth, but if your home is particularly dry with very low humidity, you’ll have more germination success by temporarily placing your seeds under a humidity dome, or simply placing an individual clear sandwich bag (preferably compostable!) over each pot if you’re only starting a few pots.
- If you’re germinating seeds in cold months, your seedlings will get off to a much stronger and faster start if you use a seedling heat mat under the tray. This will warm the root-zone temperature and speed up germination and growth.
- Watering: keep the growing mix consistently and evenly moist (think the moistness of a wrung out sponge). Tomatoes thrive with even moisture with good air circulation around their roots – they don't like "wet feet"! Keep this consistent moisture until harvest.
*Micro tomatoes are pretty small plants. Depending on how much light your plants receive and your growing environment, it’s possible you could grow them to harvest in the same pot in which you germinated the seeds – it just depends on the size. Or you may want to transplant them into a 6” pot, which I’ll teach you about here coming up.
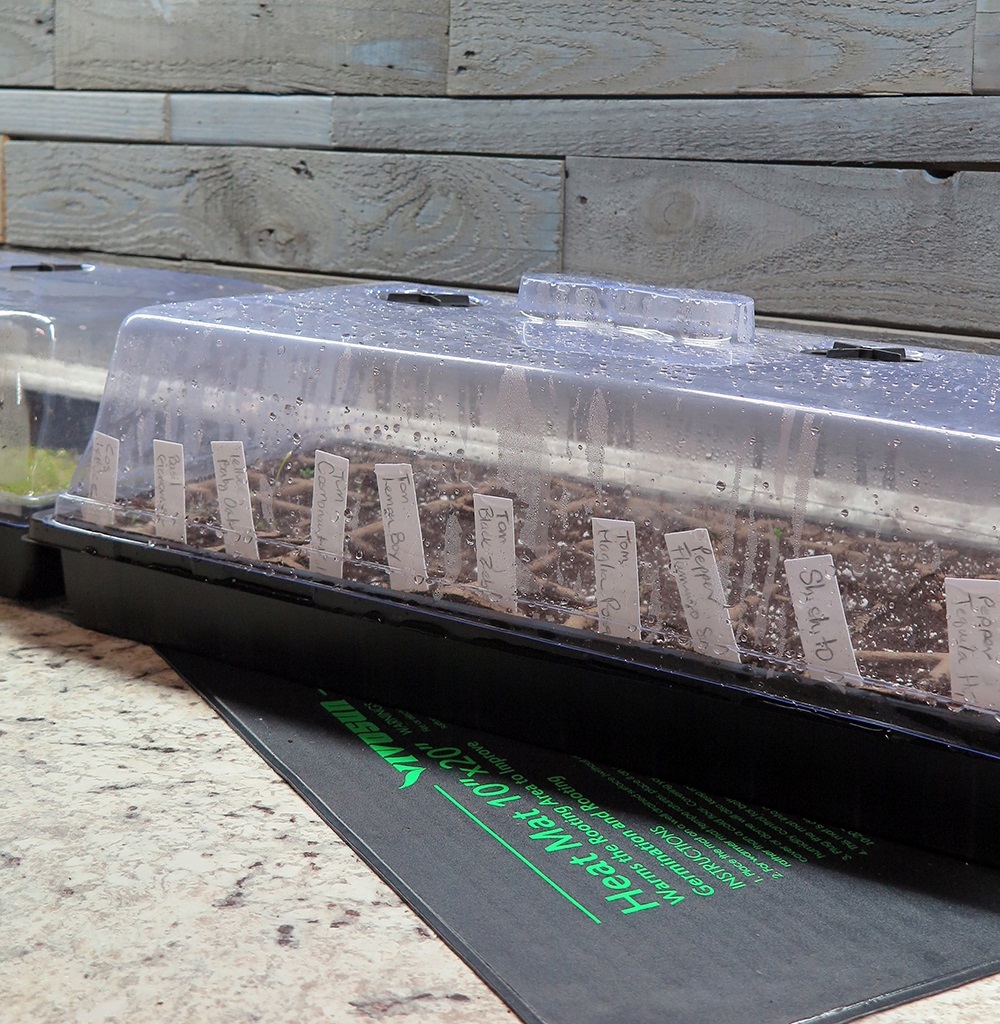
Seedlings under a humidity dome, and on top of a seedling heat mat
PC: Leslie F. Halleck
Step 4: BRIGHTEN UP! How much light to start?
Even if you are growing dwarf tomatoes in a bright window, they’ll typically need more intense light to thrive than your windowsill provides. Here are some basic lighting guidelines if you are using a 20W full spectrum LED grow light*. Typically, this small type of LED will support one dwarf tomato plant if it's a spotlight, or 1-3 plants if it's a bar. But that always depends on how much ambient light you do, or don't, have in your space.
Everyone’s growing environment is different. Observe your plant closely and be ready to adjust your lighting if needed. If plants begin stretching you can move your grow light closer to the plant to increase intensity and light quantity. If plants are yellowing or burning raise up the grow light a little farther from your plant.
When growing tomatoes from seed, you can expect to harvest mature fruits anywhere from about 90-112 days from when you plant the seed, or 50-60 days from when you transplant a seedling. Each cultivar will have slightly different days-to-maturity, which will be listed on the seed pack, but can differ depending on growing conditions and temperature. Plants grown in cooler temperatures will develop more slowly, whereas plants in warmer temperatures can develop faster.
- Seedling Week 2-5: DLI (Daily Light Integral): 15 Mol/m2/day
- As soon as you see germination occurring make sure you grow light is on. This is one of the worst times for your seedling to not have enough light, as overstretched seedlings are often doomed! Germination usually occurs between 7-10 days, depending on home temperature. Warmer temperatures will speed germination (this is where a seed het mat helps).
- Place your 20W lamp 12” above your seedling pot and run your lamp for 12 hours.
- This will give your seedling a PPFD of approximately 200-300 umol/m2/s, which is ideal for this stage of seedling growth, and the target DLI.
*These are approximations based on output of quality 20W LED grow lights in the 3000-3800k range. Actual output and intensity at different distances will vary by grow lamp and be impacted by the amount of natural light in your space. You may be able to run your lamps for less time inf a southern window for example, or you may have to run them longer in a darker area of your home.
Generally, I'd recommend at least bumping to a 30-32 watt spotlight LED for your miniature tomato plant, as you'll likely get more fruit! If you bump from a 20-watt to a 32-watt, you may be able to run your lamp for a shorter time, or raise it a bit higher above your plants. I do like the 32-watt GE grow bulbs you can screw into any fixture - they are available in both a cooler and warmer spectrum, that you can switch between for different phases of leafy to fruity growth.
Learn a bit more about how much light your tiny tomatoes need, and more on how to stage and stagger the lighting schedule and spectrum as plants mature HERE.
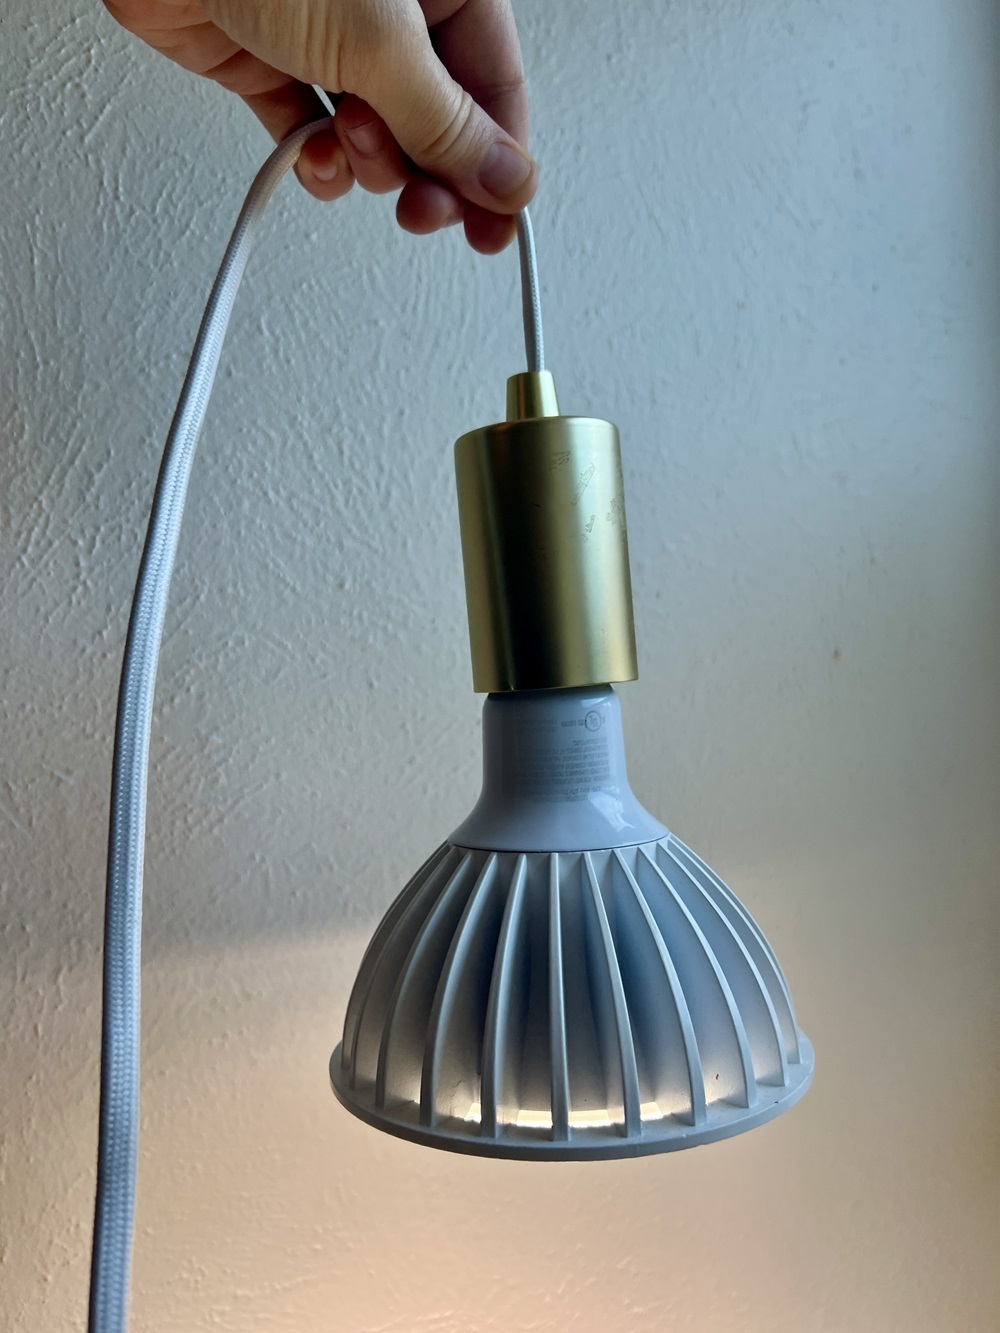
32-watt spotlight LED grow Light
PC: Leslie F. Halleck
Step 5: FEED YOUR BABIES
About two to three weeks after seedling germination, when your seedlings have their first set of true leaves, you'll need to apply some fertilizer. It's at this stage the seedling is beginning to grow the tiny root hairs that absorb water and nutrients. But again, micro tomatoes are pretty small plants, so don't go crazy with fertilizer - either too strong or too much. Look for all natural or organic vegetable or tomato fertilizers with a lower nitrogen content – something with a guaranteed analysis of around 3-4-6 N-P-K works well. If your plants look a little pale or lack vigor, bump to something similar to a 6-12-6 N-P-K (This is a balance I use quite often in a liquid feed).
If you use a low nitrogen synthetic granular fertilizer, you’ll apply it once every couple of weeks by watering it into the growing media. However, if you are using a slow-release granular synthetic, you may only need to apply it once or twice total. Granular feeds are applied as a side-dressing, or simply sprinkling into the top of the growing media.
I find with tiny tomatoes using a liquid fertilizer that has some water-soluble nutrients available is preferred. Remember that if you’re using a granular or powered fertilizer, check the label – if it does not have a guaranteed analysis of available nutrients, then you should consider it more of a soil conditioner (rather than a fertilizer) that needs to break down over time before it will provide nutrients to your plants. Given tiny tomatoes are a relatively short crop, you probably need something that works a little faster, but is still gentle.
If you’re using a liquid fertilizer, you can apply it weekly until harvest, but make sure you follow the label mixing instructions and you do not use too much.
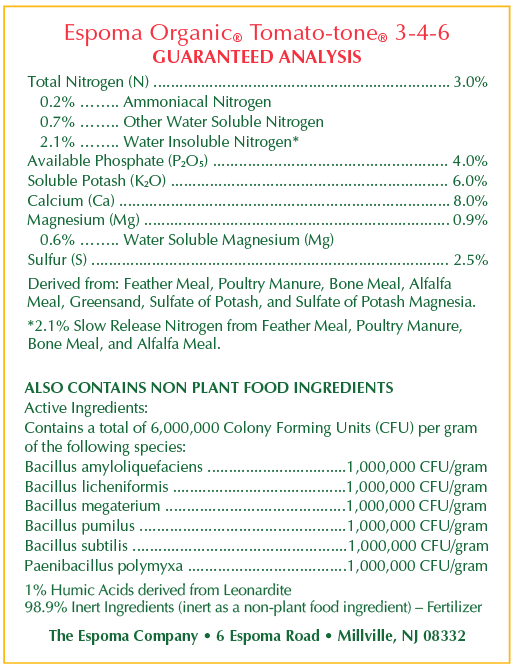
Here is an example of an organic granular fertilizer, Tomato tone, that does have a small amount available water soluble nitrogen that can be taken up by your plants right away. Always read the label!
PC: The Espoma Company
Step 6: HEALTH CHECK
When you grow any plants indoors, you’re essentially creating the perfect environment for pest or disease issues to grow out of control. You’ll need to regularly check for signs of common diseases such as powdery mildew, leaf mold, leaf spot, and even root rot, which can affect your tomato plants. Other pests include spider mites, mealybugs, and aphids. Typically plants that get enough light indoors and don’t stay too wet shouldn’t have much disease or pest pressure, but low humidity can often encourage spider mites on tomato plants.
You may need to use a pest control treatment, but remember you're growing edible plants! Do not use any sort of systemic pesticide. Stick to mild natural topical treatments, such as insecticidal soap or horticultural oils. Sticky traps can help you monitor pest populations and manage some of the adults insects and mites. I go into more detail on pest management in both my books "Gardening Under Lights" and "Plant Parenting".
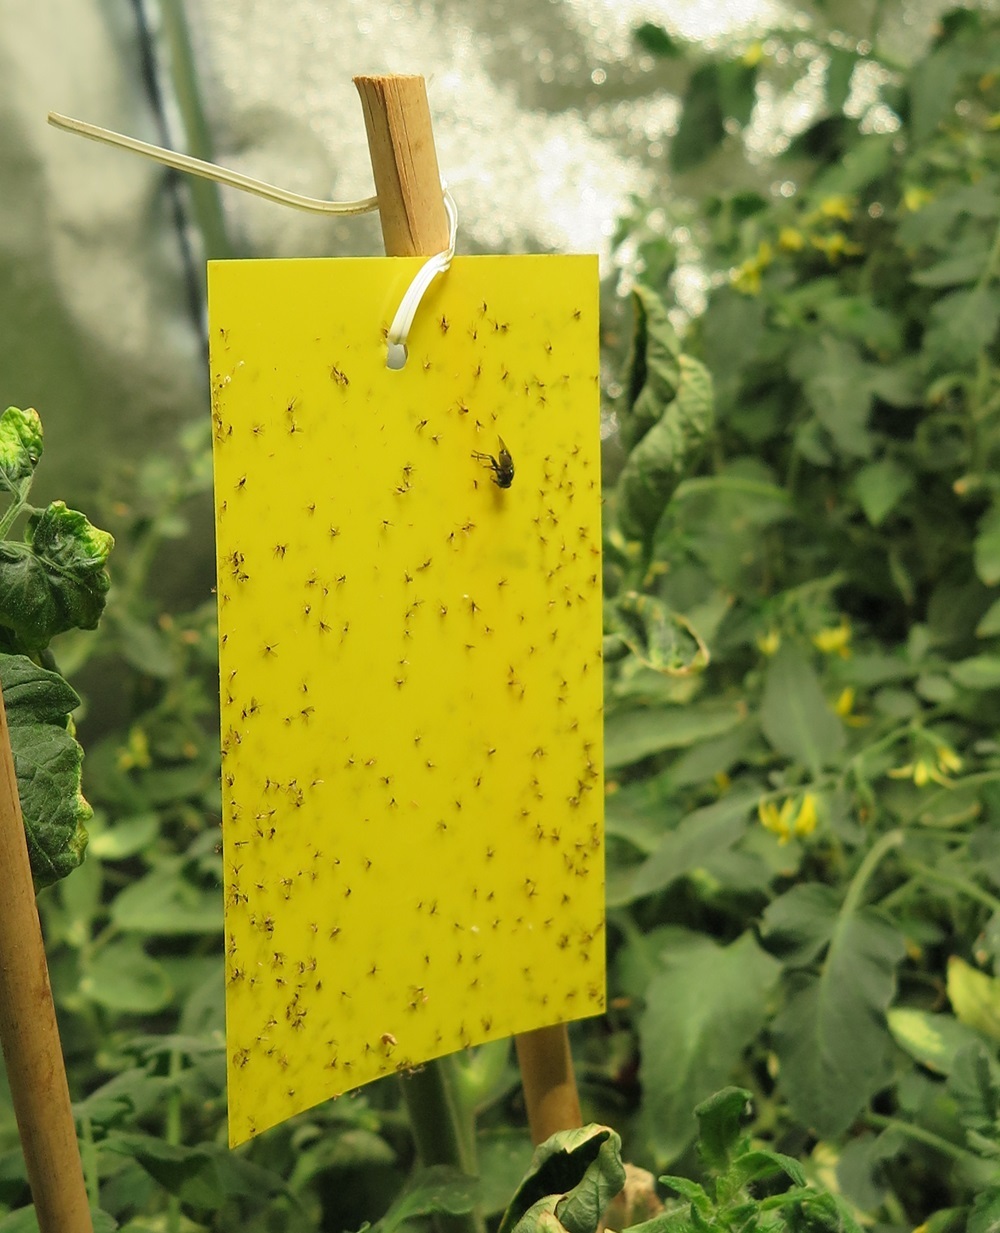
Yellow Sticky Traps
PC: Leslie F. Halleck
Step 7: POTUP & VEG OUT…Let's boost the light!
VEG OUT: As your tomato plants grow, you’ll need to increase the amount of light they are getting so they can put on more vegetative growth (stems and foliage) to support the coming flowers and fruits). . You can do this pretty easily by simply lowering your grow light so it’s a bit closer to your plants. Or you can also prop your pots up to be closer to the light if you can’t move it.
- Vegetative Phase Week 5-9: DLI 18-20 Mol/m2/day
- Place your grow light about 8-9 inches above your plants and rune the lamp 13-14 hours
- This will give your seedling a PPFD of approximately 400-600 umol/m2/s
Step 8: POT UP? Week 5-6
Is it time to repot your seedlings? It's usually a good idea to bump your micro tomatoes up to a slightly larger pot...but not too big. Micro tomatoes are pretty small plants. Depending on how much light your plants receive and your growing environment, it’s possible you could grow them to harvest in these same pots you started your seeds in, especially if they were 3-4" sized pots. It However, if you started your seeds in tiny plug trays, then you'll need to repot them. Otherwise, roots become restricted and plant growth is stunted.
Depending on conditions, especially if you're provided enough light, you may have seedlings that grew vigorously and have already rooted out to the bottom of the plug or pot before week 5 - keep an eye on your seedlings as they may need repotting a bit sooner. Once roots have reached the bottom of the pot or plug, it's time to bump it up! (no larger than 6” diameter is necessary to finish most micro tomatoes).
Transplant your tomatoes into their new pot with a lightweight indoor potting mix. You can choose a premixed indoor potting mix or lightweight mix for vegetables and herbs. Just stay away from heavier chunkier mixes that contain a lot of bark or lots of organic matter - these are best for your outdoor plantings.
How To Transplant:
- Fill your 5-6"pot halfway with lightly moistened potting mix.
- Take your transplant and gently squeeze the plug on both sides to loosen the roots (if you've used expanding loose coir plugs, oasis, or rockwool you don't need to do this).
- Tip the plant towards your hand and gently slide the pot away from the root ball. Try to disturb the root system as little as possible, as these are small plants. If it's stuck, you can stick the tip of a pencil through the bottom plug hole to nudge the seedling out.
- Set your tomato plant on top of the potting mix in the pot.
- Backfill with additional potting mix around the transplant’s root ball.
- With tomato plants it’s ok to add potting soil so that it covers some of the base of the main stem. Meaning, it’s ok, and often beneficial, to plant tomatoes a little deeper than where they originally emerged as a seedling. (note, not all plants can tolerate deeper planting and often recommend the opposite!)
- Lightly press potting mix around the plant to stabilize it.
- Lightly water the container so there is even moisture, and some water comes out of the bottom of the container.
Tomato Care Reminder: Don’t forget to Fertilize! Side dress with a granular fertilizer now, or use a liquid fertilizer.
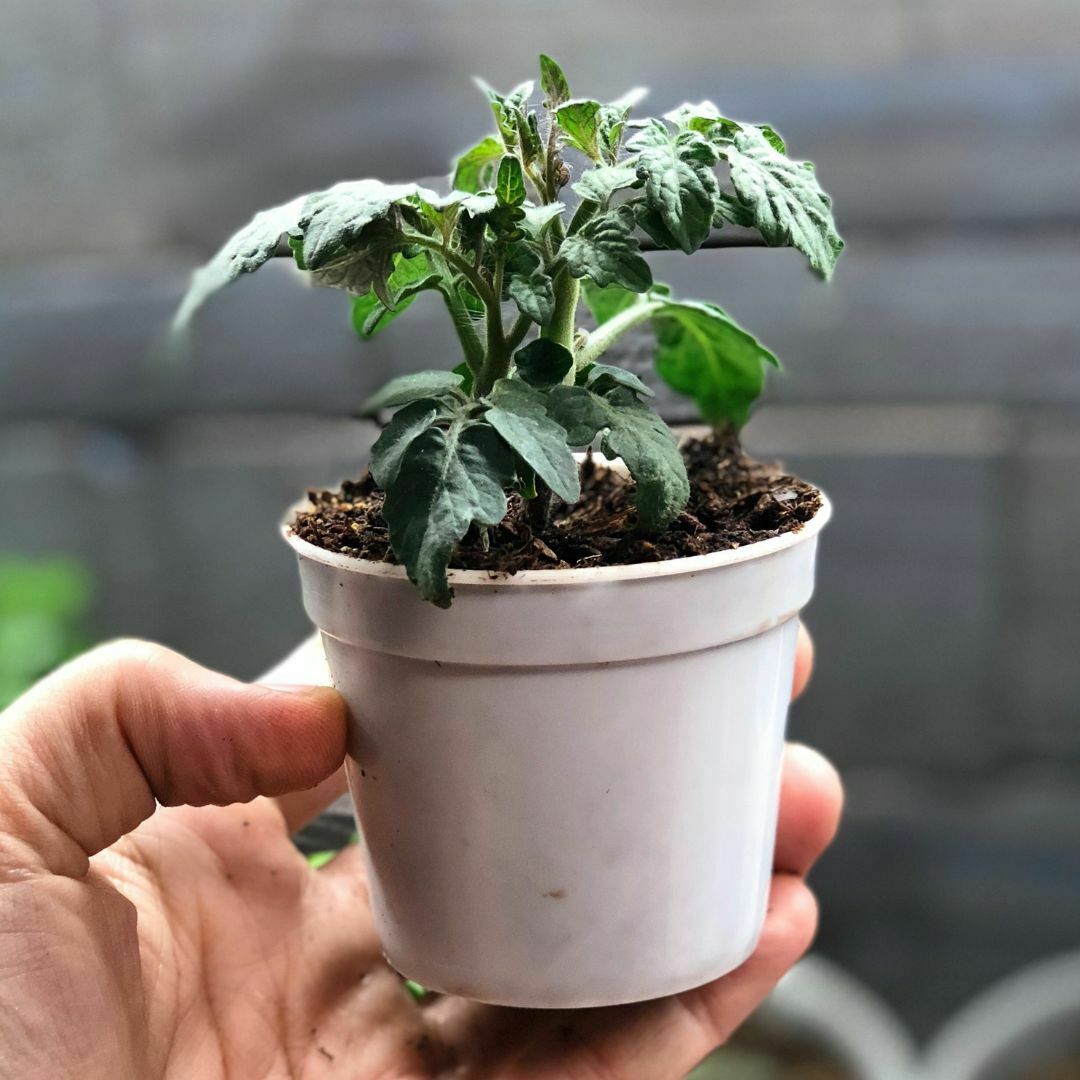
'Red Robin' seedling in a 2" pot, this seedling will need to be transplanted into a 5-6 " pot for finishing. If you look closely, you'll see this tiny tomato is already developing flower buds!
PC: Leslie F. Halleck
Tip: if you'd like to try and keep your tiny tomatoes for a second harvest, it's a good idea to bump them up to a 1-gallon sized container, especially if the root system is getting too big for the current pot.
Step 9: ILLUMINATE YOUR HARVEST How much light for flowers & fruits?
Remember, tomatoes are full sun loving plants. Making flowers and fruits takes a lot of energy. So now is when you want to try and deliver the equivalent of full sunlight to your tiny tomato plant. Remember, you can do this easily by simply lowering your grow light so it’s a bit closer to your plants. Or you can also prop your pots up to be closer to the light if you can’t move it.
- Flowering & Fruiting Weeks 9-14: DLI 30 Mol/m2/day
- Place your grow light about 6-8 inches above your plants and run the lamp for 14 hours.
- This will give your seedling a PPFD of approximately 600-900 umol/m2/s, which is ideal for this stage of development, with the target DLI.
*These are approximations based on output of quality 20W LED grow lights in the 3000-3800k range. And again, this is for one plant, not a group of plants over a larger surface area. Actual output and intensity at different distances will vary by grow lamp and be impacted by the amount of natural light in your space. You may be able to run your lamps for less time inf a southern window for example, or you may have to run them longer in a darker area of your home.
Be sure to observe your plant and make lighting adjustments as needed. If your plant looks like it’s stretching move your grow light closer to the plant. If it appears to be yellowing or burning raise up the grow light a little farther from your plant.
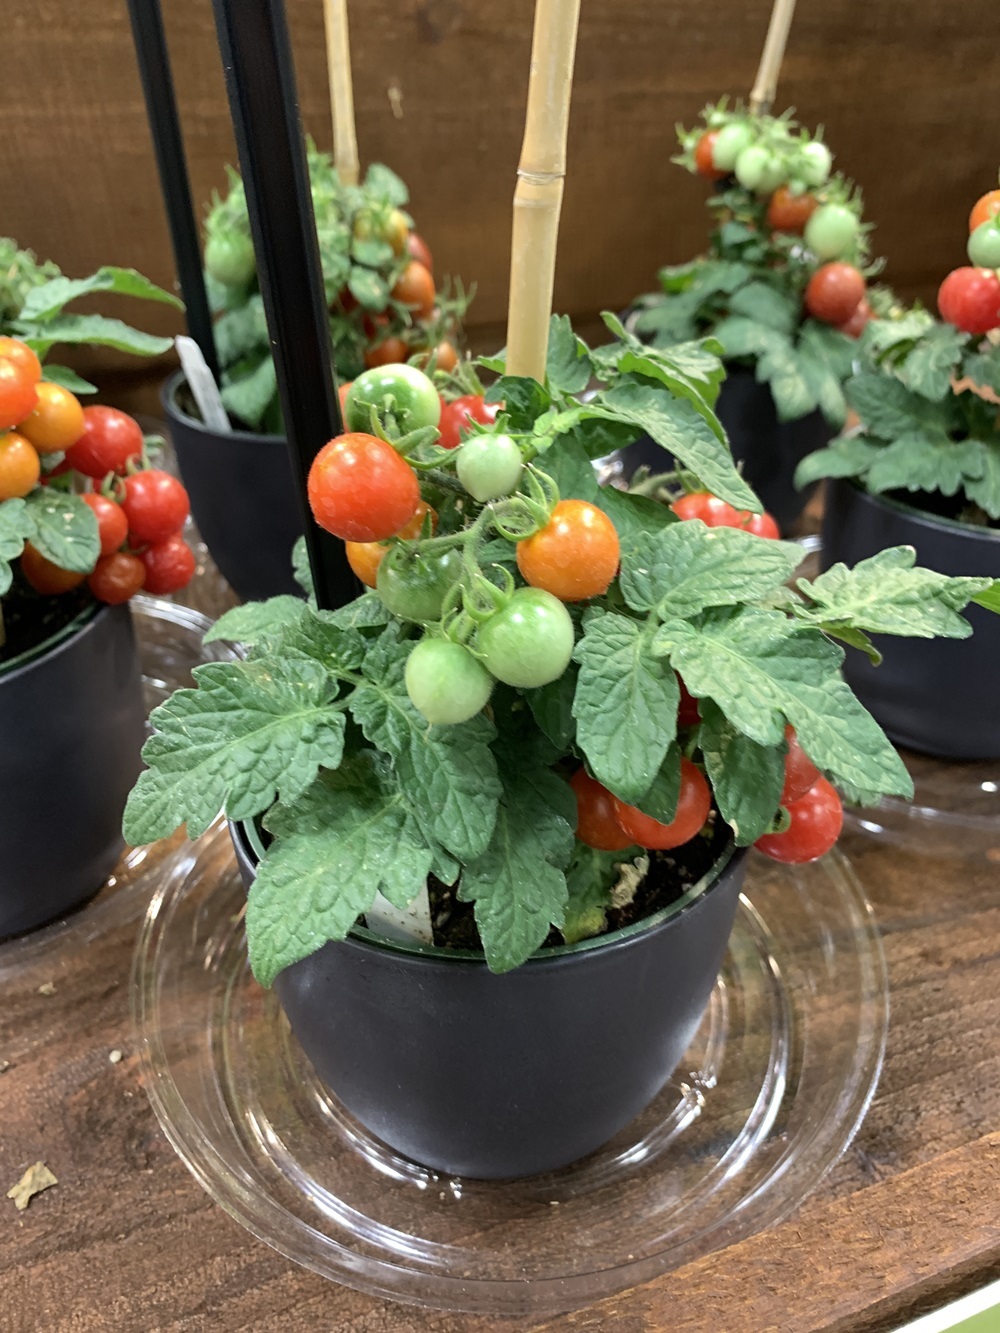
Step 10: HARVEST & ENJOY!
Once your tiny tomatoes are ripe it’s time to pick and eat. One thing to know about micro tomato cultivars is that most of them are determinate, meaning they’ll set most all of their fruit at once, or in a short period of time…and then plants may “crash”. They could collapse and die, or if you’re practiced in tomato growing and you catch plants soon enough, you can cut them back, fertilizer them, and see if they’ll regrow successfully for you. Don’t be sad if they don’t, it’s just a normal cycle for these plants. If your tiny tomato plant crashes after it produces fruit, just start another seedling! That’s really the fun of it anyway, right?
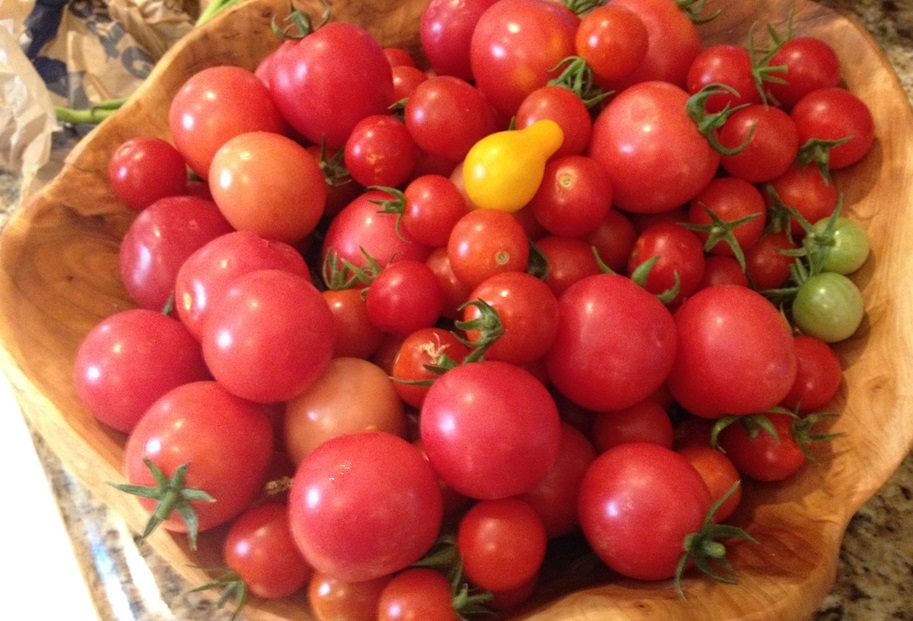
Cherry tomato harvest
PC: Leslie F. Halleck
This post is not sponsored, does not contain any paid advertising, nor any free products for endorsement...because I don't do that stuff! Any products mentioned are simply items I use or made a good example for this project.